You have just finished installing IIS on your Windows OS. You’re probably thinking that you can delve into the web development world and forget all about the underlying web server. After all, IIS is a Microsoft product so it should install with the right default configuration settings, right? That is far from true with IIS.
In this article, I will provide 8 tips that you can use to secure your IIS installation.
Move the Inetpub folder to a different drive
The Inetpub folder is the default location for your web content, IIS logs and so on. By default IIS 7 and upwards install the Inetpub folder in the system drive. It’s good practice to move the Inetpub folder to a different partition so that the web content is separate from the operating system. This folder can be moved after IIS installation is completed.
Install the appropriate IIS modules
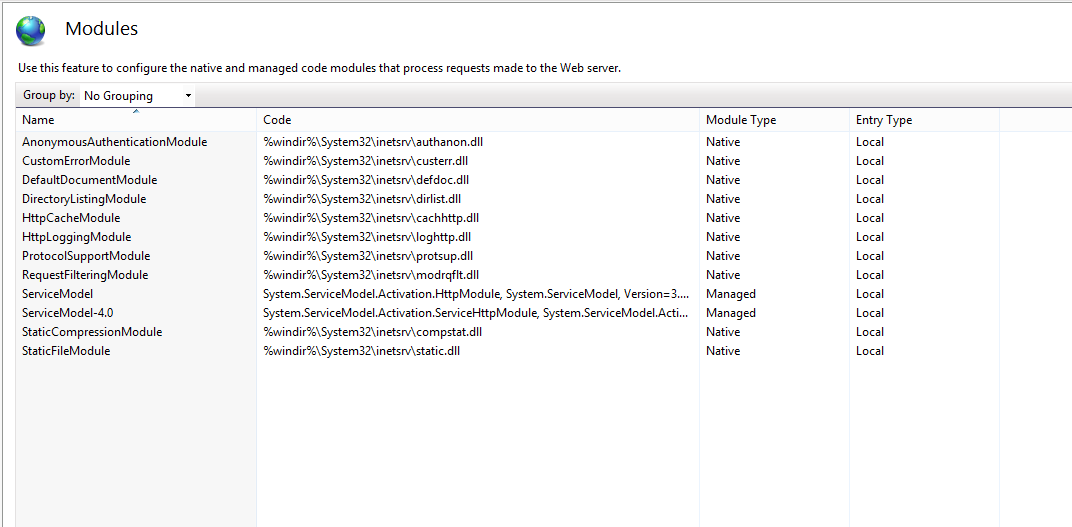
IIS includes more than 30 modules – you should only install the ones which are needed by your web applications. Disable any modules that are not required, to minimize the capacity of potential attacks. Periodically review the modules that are installed and enabled and remove any that are no longer required. You can use IIS Manager to list all the modules that are enabled.
- Open IIS Manager
- Select the name of the machine to view the modules for the whole machine, or change to the specific web site to view the modules enabled for the selected site
- Double click on ‘Modules’
- To disable a module, click on the module from the list and select ‘Remove’ from the Actions pane
- Confirm the removal by pressing Yes
Disable the OPTIONS method
The OPTIONS method provides a list of methods that are supported by the web server. Although this might seem beneficial, it also provides useful information to an attacker. This will provide information to an attacker at the reconnaissance stage of this attack. Therefore it’s recommended to disable the OPTIONS method completely. This can be done by denying the OPTIONS verb from the HTTP Verb request filtering rules in IIS.
- Open IIS Manager
- Select the name of the machine to configure this globally (or change to the specific web site for which you need to configure this)
- Double click on ‘Request Filtering’
- Change to the HTTP Verbs tab
- From the Actions pane, select ‘Deny Verb’
- Insert ‘OPTIONS’ in the Verb, and press OK to save changes

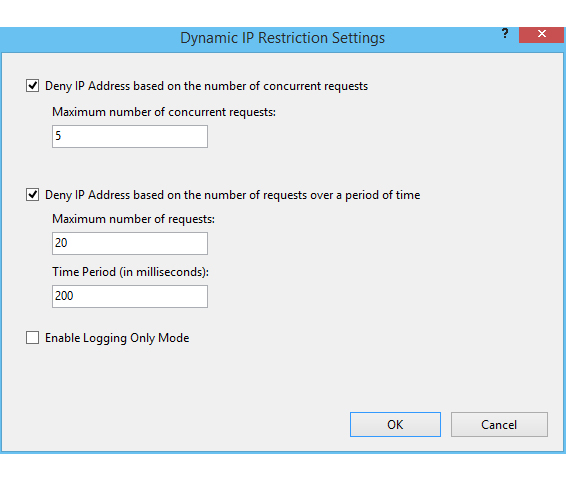
Enable Dynamic IP Restrictions
The Dynamic IP Restrictions module helps blocks access to IP addresses that exceed a specified number of requests and thus helps prevent Denial of Service (DoS) attacks. This module will inspect the IP address of each request sent to the web server and will filter these requests in order to temporarily deny IP addresses that follow a particular attack pattern. The Dynamic IP Restrictions module can be configured to block IP addresses after a number of concurrent requests or by blocking IP addresses that perform a number of requests over a period of time. Depending on your IIS version you will need to enable either the ‘IP Security’ feature or the “IP and Domain Restrictions” as explained in this Microsoft article.
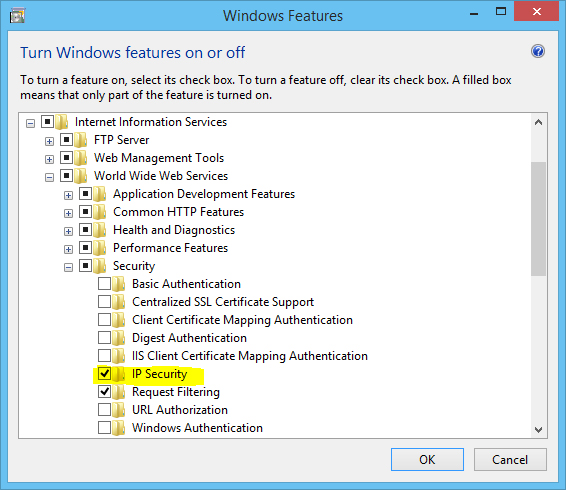
This will include the ‘IP Address and Domain Restrictions module in the IIS Manager, from where dynamic IP restrictions can be set.
- Open IIS Manager
- Select the name of the machine to configure this globally (or change to the specific web site for which you need to configure this)
- Double click on ‘IP Address and Domain Restrictions’
- From the Actions pane, select ‘Edit Dynamic Restriction Settings’
- Modify and set the dynamic IP restriction settings as needed and press OK to save changes
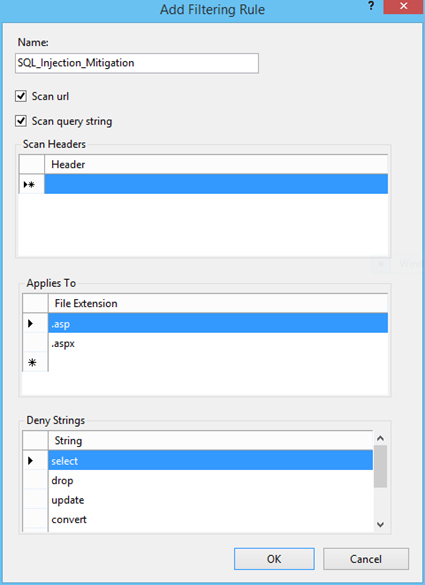
Enable and Configure Request Filtering Rules
It is also a good idea to restrict the types of HTTP requests that are processed by IIS. Setting up exclusions and rules can prevent potentially harmful requests from passing through to the server, since IIS can block these requests on the basis of the request filtering rules defined. For example, a rule can be set to filter traffic for SQL Injection attempts. Whilst SQL Injection vulnerabilities should be fixed at source, filtering for SQL Injection attacks is a useful mitigation. This can be set from the Rules tab found in the Request Filtering page in IIS Manager.
- Open IIS Manager
- Select the name of the machine to configure this globally (or change to the specific web site for which you need to configure this)
- Double click on ‘Request Filtering’
- Change to the Rules tab
- From the Actions pane, select ‘Add Filtering Rule’Set the required rules, and press OK to save changes
The rule set in the below screenshot would instruct IIS to check for the provided strings in requests for .asp and .aspx pages. IIS will then block the request if any of these strings are found.
You can also filter requests that contain things like high-bit characters or double escape characters. This and other similar filtering options are explained at http://technet.microsoft.com/en-us/library/hh831621.aspx
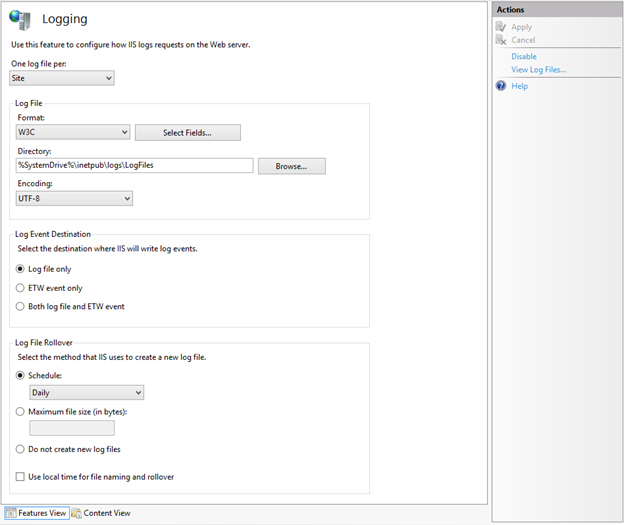
Enable logging
Configuring IIS logging will cause IIS to log various information from HTTP requests received by the server. This will come in handy and can give a better understanding of issues that might have occurred on your website when things go wrong. It’s the place where you will start the troubleshooting process in such situations.
The server’s logs can also be continuously or periodically monitored in order to review the server’s performance and provide optimizations if needed. This can be automated using various server monitoring tools. Make sure to keep a backup of the logs. Microsoft also provide Log Parser, which is a tool that can be used to query and retrieve specific data from IIS logs. Additionally, log consolidation tools prove useful for consolidating and archiving data from logs in a more meaningful way.
IIS logging can be enabled and configured from IIS Manager > select the machine name or the specific site you want to configure > Logging. Since these log files might grow quite large, it would be a good idea to start a new file periodically.
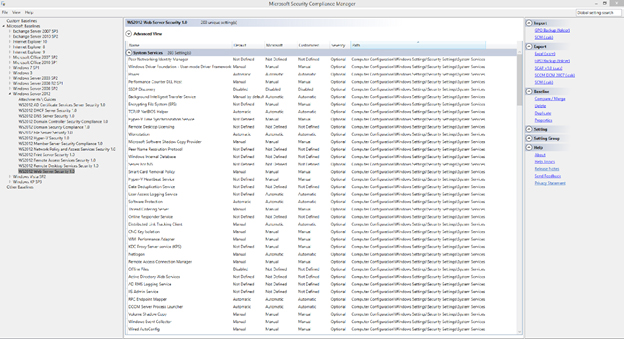
Use the Security Configuration Wizard (SCW) and the Security Compliance Manager (SCM)
Both of these Microsoft tools can be used to test your IIS security. The Security Configuration Wizard (SCW) runs different checks and provides advice and recommendations on how to boost your server’s security. The Security Compliance Manager (SCM) tool performs security tests on your server and compares server configurations to predefined templates as per industry best practices and security guide recommendations.
Updates
Finally, ensure that you keep up to date with the latest updates and security patches. It is interesting how often this basic security requirement is missed. The majority of hacks affecting the web server occur on unpatched servers. This just demonstrates how important it is to always keep your IIS web server up to date.