
October 7, 2016 18:56 by
 Scott
Scott
That has been a question we have come across frequently. Before IIS 8, you could host multiple sites needing SSL on a single IP address if the sites utilized the same SSL certificate or used a wildcard SSL certificate. A wildcard certificate was only beneficial if you needed SSL on the subdomain level of a current site/domain. But what if you had sites with different names? Well, you could get a Subject Alternative Names (SAN) SSL certificate. This SSL certificate would allow you to protect multiple sites with a single SSL certificate. The last available option prior to IIS 8 required setting each additional SSL site on the same IP address but with a different SSL port number. This would allow you to utilize each site’s/domain’s SSL on the same IP address as another site. By default, SSL certificates utilize port 443 for secure communication. This port doesn’t need to be specified in the URL since this is the standard port. When you use a different port number for SSL you will be required to add the non-standard SSL port number in the URL in order for it to work. As you can imagine, this is not the way you want to run a public site. How would a user know to enter the port number and it’s not a common step that users are familiar with doing when browsing a site.
Adding an additional IP address to host another site needing SSL is the common method used but sometimes this isn’t an option for some people. With the inception of IIS 8 on Windows Server 2012, a new feature called Server Name Identification (SNI) was added. This feature offers an easier solution to hosting multiple sites that have a different or individual SSL on a single IP address. This feature is included in IIS 8 by default and doesn’t require the installation of any additional features to begin using it. Below, we will walk through the steps involved with configuring SNI. One thing to note with implementing SNI for your SSL solution, it will not work for those users running Internet Explorer on Windows XP. If your server has multiple IP addresses, you can implement SNI for some sites in addition to assigning individual sites to a single IP address for SSL. Both methods will work along side each other on different IP addresses without issue.

Steps:
1) One of the first things you will need to do is import the SSL certificates for each site on the server if this hasn’t been done already
2) Next, open IIS 8 Manager and add your first site that will need SSL
a. If the first site is already in place, proceed to step the next step
3) After the site is added select the site and click Bindings… under the Actions menu pane on the right

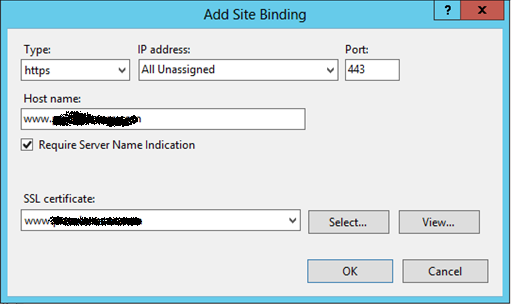
4) Click Add
a. Select https for the Type
b. You can leave the IP address to “All Unassigned” or choose the IP address you want to use
(If you have multiple IP’s on the server you will want to specify the one you want to use for SNI)
c. Enter your site/domain name for Host name
d. Check the box for “Require Server Name Indication”
e. Select the SSL certificate for the site from the drop down box
f. Click OK
5) Create the second site and add the SSL binding following the steps below
6) Select Bindings and click Add
a. Select https for the Type
b. You can leave the IP address to “All Unassigned” or choose the IP address you want to use
(If you have multiple IP’s on the server you will want to specify the one you want to use for SNI)
c. Enter your site/domain name for Host name
d. Check the box for “Require Server Name Indication”
e. Select the SSL certificate for the site from the drop down box
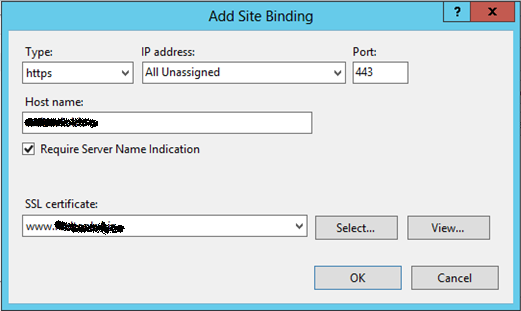
7) Click OK to complete the setup
That’s all that needs to be done. Test SSL for the site to make sure each site is working properly. If you have additional sites that need SSL added, you can continue following the steps above for adding the SSL binding for each new site.