This article shows you how to install multiple SSL certificates for Server Name Indication using the Management Console on Windows 2012 Server. If you wish to install a single certificate on IIS 8, please refer to the IIS 8 SSL Installation Instructions. Or if you didn't generate a certificate request (CSR) yet, and didn't order a certificate, please see IIS 8 SSL Certificate Request Instructions.

Here are the steps how to install multiple SSL certificate on Microsoft IIS 8:
Step 1
Save the certificate you received to the desktop of your Windows 2012 Server.
Step 2
Open the IIS console by clicking Start, then opening Administrative Tools, then Internet Information Services (IIS) Manager.
Step 3
Click on your server's name in the left pane.
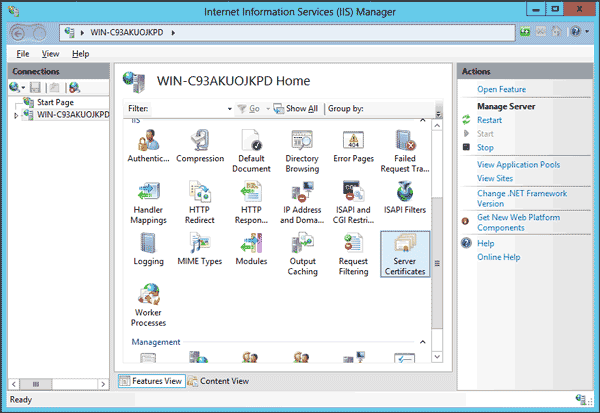
Step 4
In the center pane, double-click Server Certificates in the IIS section.
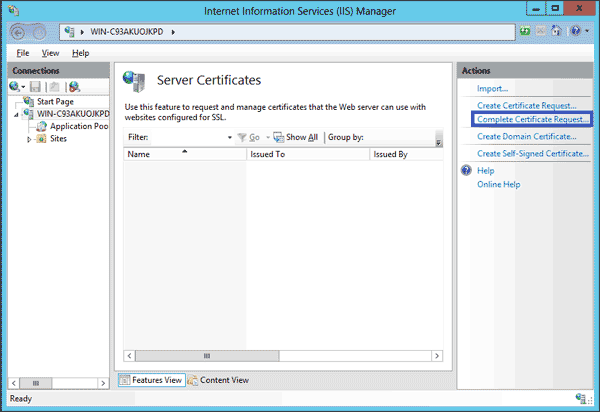
Step 5
In the Actions menu in the right pane, click on "Complete Certificate Request" to open the Complete Certificate Request Wizard.
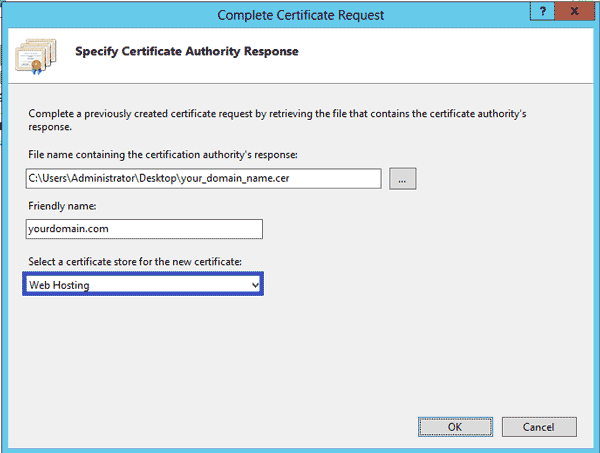
Step 6
Browse for the certificate file you just saved to your desktop. Enter a friendly name to identify the certificate with. This name will not be part of the certificate, but serves to identify the certificate for the server administrator. Use the same domain name you used when requesting your certificate. Select the Web Hosting certificate store. Click OK to store the certificate on the server.
You may encounter a known issue on IIS 8 if you receive the message "Failed to remove the certificate". In that case, click Cancel to exit the dialog, and refresh the server certificates list by pressing F5. If your certificate appears in the list, it installed correctly. However, you may want to check that it was saved to the correct Web Hosting store. If your certificate doesn't appear, you will need to re-issue your certificate with a new CSR.
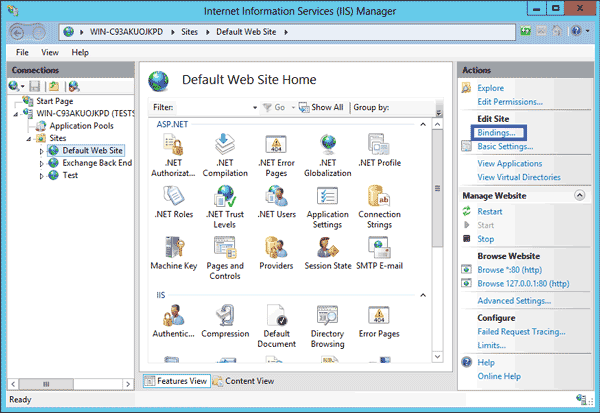
Step 7
The certificate is now installed on the server, but must be assigned to a web site in IIS. Click on your server name in the left pane to browse the sites, and select the site you wish to assign the certificate to. In the Actions menu in the right pane, click "Bindings" to add a binding.
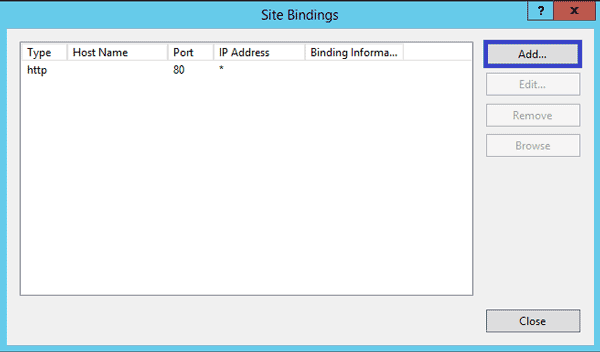
Step 8
In the Site Bindings window, click "Add" to open the Add Site Binding window.
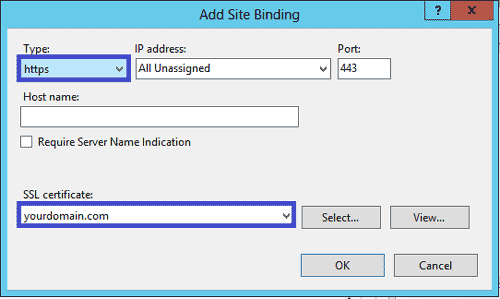
Step 9
Select https as type. The IP address should be the one your website is listening on. Alternatively, you can leave the dropdown to All Unassigned. Leave the TCP port to 443, and select the correct certificate from the dropdown.
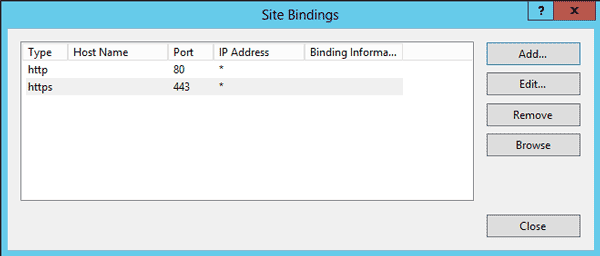
Step 10
Your first SSL certificate is now installed, and the main website is ready to accept SSL connections.
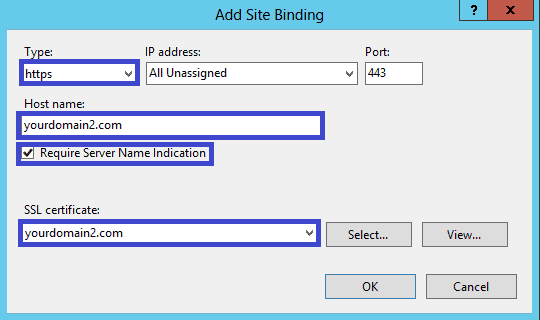
Step 11
Repeat all previous steps for installing your second certificate, up to step 9. In the Add Site Binding window, you should now check the box Require Server Name Indication. This is not required for the first certificate, which is the server's main certificate, but it is for the second and any additional certificates installed.
Step 12
Repeat the steps above for your third and any additional certificates you wish to install.
IIS 8.0 with Free ASP.NET Hosting
Try our IIS 8.0 with Free ASP.NET Hosting today and your account will be setup soon! You can also take advantage of our Windows & ASP.NET Hosting support with Unlimited Domain, Unlimited Bandwidth, Unlimited Disk Space, etc. You will not be charged a cent for trying our service for the next 3 days. Once your trial period is complete, you decide whether you'd like to continue.
