IIS 7.5 and IIS 8.0 European Hosting

BLOG about IIS 7.5 Hosting, IIS 8.0 Hosting and Its Technology - Dedicated to European Windows Hosting Customer

IIS 8 Hosting - HostForLIFE.eu :: How to Install SSL Certificate in IIS 8?

clock April 6, 2016 18:31 by author Anthony

In this tutorial, I will show you how to install SSL certificate in IIS 8.0. To communicate securely over the web requires the use of encryption on the messages passed back and forth.  Encryption on the web is accomplised through the use of Transport Layer Security (TLS). Http traffic layered over SSL/TLS is called Https.  It would be all too easy to venture down the rabbit hole and explain in great detail how TLS establishes a secure connection, but the crypto minutia is likely a bit out of scope for the purposes of this discussion.  However, a basic understanding of the mechanisms used by TLS to secure the communication channel will make understanding the use of SSL certificates much easier.

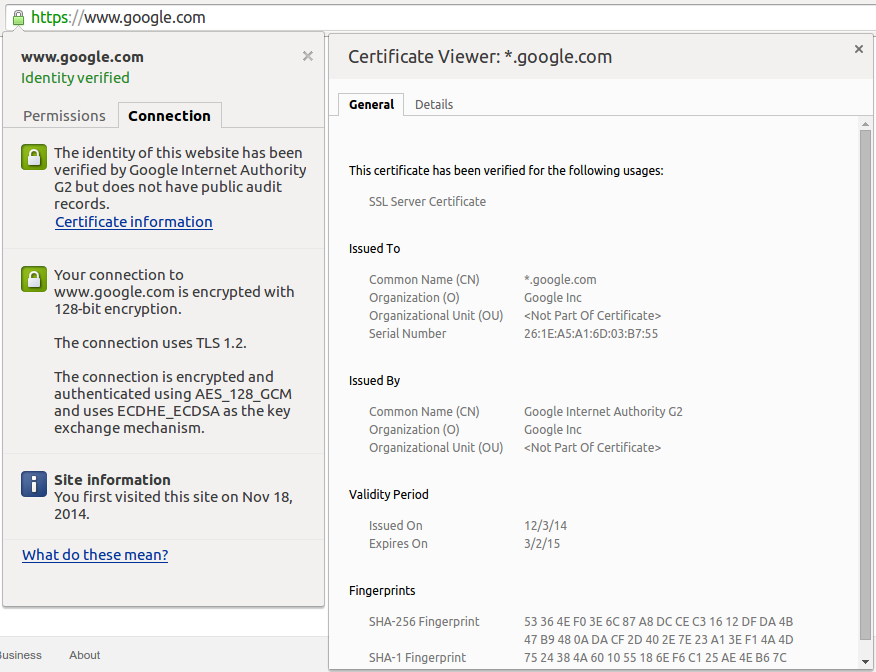
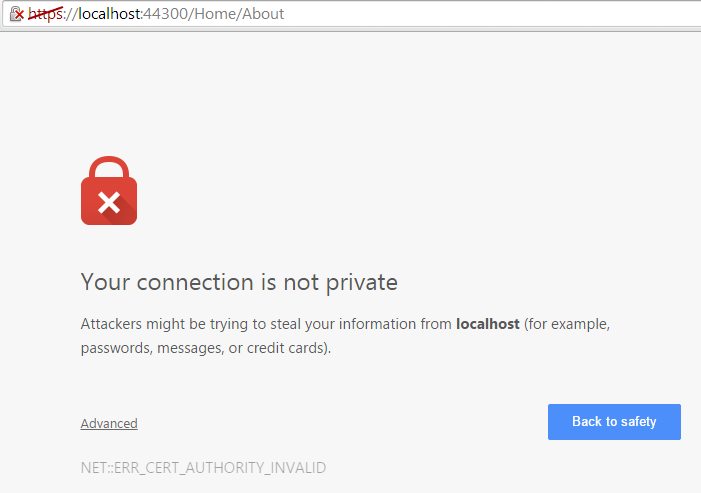
TLS uses public key cryptography, which requires the distribution of a public key.  This public key is transmitted as part of an SSL certificate, along with other identifying information meant to establish trust that a server is who it is supposed to be (and not a malicious eavesdroper).  While it is possible to create self-signed certificates, browsers do not trust these certificates and will give users dire warning when they are encountered (this would be like me printing my own drivers license and saying "See, I am who I say I am... really!").  For a certificate to be trusted, it must be issued by a trusted Certificate Authority (CA).  When a secure connection is made using a trusted certificate, most browsers will display an indicator that the connection is secure.  In Chrome, clicking the green lock icon will reveal information regarding the details of the connection:
And this is what a self-signed certificate will get you:
So to fully take advantage of Https you need to have a certificate from a trusted CA (Symantec [GeoTrust, VeriSign], Comodo, GlobalSign, etc).  Getting a certificate involves first creating a Certificate Signing Request (CSR).  IIS has the capability of creating a CSR, and their are other tools available, including the linux command line using OpenSSL.  This is what it looks like in IIS:
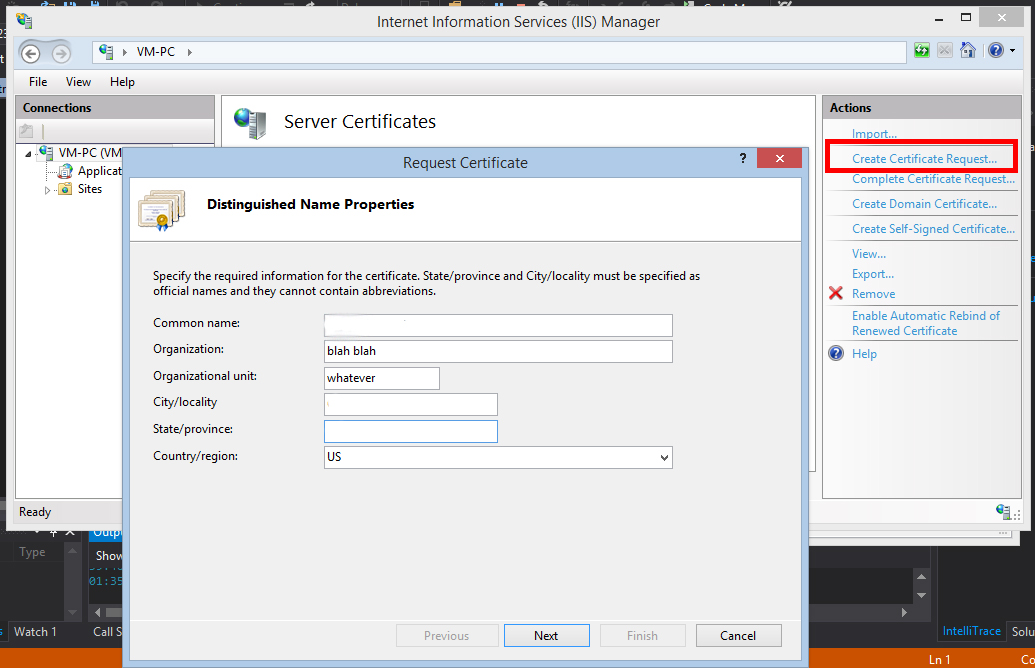
You'll transmit the CSR in one form or another to the CA you are getting your certificate from, and after they've performed whatever level of due diligence they'll send you your SSL certificate.  Once you have the certificate, you'll need to install it on the server hosting your site.  For .NET based web applications, that likely means IIS or Azure.

  • Installing SSL Certificate in IIS 8.0

In IIS Manager, under Server Certificates, there is an option for "Complete Certificate Request".  Here you'll browse to the *.cer file that contains your certificate, add a friendly name to make management easier it doesn't change anything in the certificate and add the certificate to the Personal certificate store.  This installs the certificate to the server.  To use it in your site, you have to bind it.  Navigate to the site settings in IIS, go to bindings, and add a binding for https using port 443 and the created certificate.

  • Using Https in the application

Using the URL Rewrite rule described in the Azure SSL instruction involved adding this rule to the web.config file:

<system.webServer>
  <rewrite>
    <rules>
      <rule name="Force HTTPS" enabled="false">
        <match url="(.*)" ignoreCase="false"/>
      <conditions>
        <add input="{HTTPS}" pattern="off"/>
      </conditions>
        <action type="Redirect" url="https://{HTTP_HOST}/{R:1}"
                appendQueryString="true" redirectType="Permanent"/>
      </rule>
    </rules>
  </rewrite>
  </system.webServer>

In MVC, using the [RequireHttps] attribute gives fine grained control over what portions of the site will need to use https:

[RequireHttps]
public ActionResult About()
{
    ViewBag.Message = "Your application description page.";
 
    return View();
}

HostForLIFE.eu IIS 8 Hosting

HostForLIFE.eu revolutionized hosting with Plesk Control Panel, a Web-based interface that provides customers with 24x7 access to their server and site configuration tools. Plesk completes requests in seconds. It is included free with each hosting account. Renowned for its comprehensive functionality - beyond other hosting control panels - and ease of use, Plesk Control Panel is available only to HostForLIFE's customers. They offer a highly redundant, carrier-class architecture, designed around the needs of shared hosting customers.



IIS 8.5 Hosting - HostForLIFE.eu :: How to Install Web Server in Windows 8?

clock April 1, 2016 20:42 by author Anthony

Today I will discuss about how to install IIS on Windows 8. IIS or Internet Information Services or Internet Information Server is an HTTP web server that is used in Windows server operating system, from Windows NT 4.0 Server, Windows 2000 Server or Windows Server 2003. This service is an integrated service in Windows 2000 Server, Windows Server 2003 or as an add-on in Windows NT 4.0. This service serves as a support TCP / IP protocol that runs in the application layer (application layer). IIS also be the foundation of the Internet and Intranet Microsoft platform, which includes Microsoft Site Server, Microsoft Commercial Internet System and Microsoft BackOffice products more. Web Server can be run on Windows 8 and Windows Server 2012 and earlier versions of Windows.

The relationship between the Web Server and Internet Browser is a combination or existing computer networks around the world. Once physically connected, Protocol TCP / IP (networking protocol) that allows all computers can communicate with each other reply. By the time the browser requests a web page of data to the server the instruction data requests by the browser in containers in which a TCP transport protocol and sent to the reply address in this case is the next protocol is Hyper Text Transfer Protocol (HTTP). HTTP is the protocol in use on the World Wide Web (WWW) between computers that are connected in the network in the world. To recognize this protocol clearly is very easy once where every time you type http: // ... you have to use it, and bring you into the world of internet. Data that in passing from the browser to the Web server called the HTTP request which asks the web page and then the web server for data existing HTML and packed in TCP protocol and sent back to the browser. Data sent from the server to the browser called the HTTP response. If the data requested by a browser that can not be found by the Web server will meninbulkan error that often you see on the web page that is Error: 404 Page Not Found. It gives a taste of a process that is tridimensional, meaning that Internet users can read from one document to another simply by clicking a few sections of pages of documents (web) it. The process that starts from the demand webclient (browser), web server is received, processed, and process the results returned by a web server to a web client again carried out in a transparent manner. Each person can easily find out what happened to each process. In broad outline only web server to process all the input it received from its clients web.

How to Install Web Server (IIS) in Windows 8?

  • Press the Windows key + W (Windows key and the letter w on a keyboard), then type features, and then click Turn Windows features on or off.

Step By Step Install Web Server (IIS) di Windows 8 1

  • Then click on the Internet Information Service (see picture below), and then click OK.
  • Step By Step Install Web Server (IIS) di Windows 8 2

    After the installation process Internet Information Services will run, wait for it to finish.

  • After the installation of Internet Information Service is complete, press the Windows key and then type IIS in the search box, and then click Internet Information Services (IIS) Manager, as shown below.
  • Step By Step Install Web Server (IIS) di Windows 8 3

  • In Internet Information Services (IIS) Manager, click the arrow on the name of your computer> sites> then click Default Web Site, as shown below (4a). Then click the Basic Settings in the action pane to the right (4b).
  • Step By Step Install Web Server (IIS) di Windows 8 4

  • Here we will try to override the default physical path where the data of our website later. In this example I will create a folder called "mywebsite" on drive C :, then his path to C:\mywebsite, as in the image below. I click the "..." as in the picture, and navigate his path to the C:\mywebsite, and then click OK.
  • Step By Step Install Web Server (IIS) di Windows 8 5

    To perform the test helloworld create a file called index.htm in the folder C:\mywebsite. Then type localhost in your browser.

    hello word


HostForLIFE.eu IIS 8.5 Hosting
HostForLIFE.eu revolutionized hosting with Plesk Control Panel, a Web-based interface that provides customers with 24x7 access to their server and site configuration tools. Plesk completes requests in seconds. It is included free with each hosting account. Renowned for its comprehensive functionality - beyond other hosting control panels - and ease of use, Plesk Control Panel is available only to HostForLIFE's customers. They offer a highly redundant, carrier-class architecture, designed around the needs of shared hosting customers.


IIS 8.5 Hosting - HostForLIFE.eu :: How to Fix: “HTTP Error 401.3 – Unauthorized” Error in IIS ?

clock October 8, 2014 08:05 by author Peter

Today, I am going to show you how to fix How to Fix: “HTTP Error 401.3 – Unauthorized” Error in IIS. While working on my site, I got a small issue with IIS. I had set up a new virtual directory for the site but when the site was viewed in the browser the IIS error was displayed:
Server Error in Application “DEFAULT WEB SITE”
HTTP Error 401.3 – Unauthorized
You do not have permission to view this directory or page because of the access control list (ACL) configuration or encryption settings for this resource on the Web server.

As you can see on the picture below:

Judging from the error the permissions on the folder was incorrect. And a quick peek at the properties confirmed this. Admittedly, I don’t have much experience with  IIS 7+ (IIS 6 & 6.5 that’s a different story). So when I tried to add the correct user account to the I couldn’t identify the correct user account. Honestly, I was actually looking for IUSR_MachineName . As it turns out IUSR_MachineName was removed in IIS 7 and replaced with IUSR. So adding the IUSR user account to the folder and everything worked. Yes, it was a simple fix but it can be an annoying one if you don’t know what to look for.


European IIS 8.5 Hosting – HostForLIFE.eu :: How to Configure Dynamic Website Activation in IIS 8.5

clock August 15, 2014 07:43 by author Onit

In this article we will showed you how to configure Dynamic Website Activation.

One of the best feature in the latest IIS 8.5 is the “Dynamic Website Activation”. What so cool about this feature? When the IIS servicing large number of configured sites (100 or greater, by default) this feature let the IIS Service not activate any of the sites when the service started.


What is The Function?

When IIS servicing a large number of configure sites (default: 100 or greater), IIS will not activate any of the sites (all of them at once).

Why Using This Feature?

This Feature only available in the latest IIS 8.5 before this version IIS will automatically activates all configures websites at once. This will bring some trouble in the resources, and memory if it’s service the large number of sites.

How This Feature works?

If IIS 8.5 service in a large number of configured sites (default: 100 or greater), This service will not activate all of the sites at once, instead of activate them all at once IIS will activate each sites one by one (only when it receives the first request of the sites) and by using this technique could reduce the amount of system resources require by IIS.

How to Configure This Feature?

As I mention before, if there are less than 100 sites configured then IIS will activate all sites at starts up, but if there are 100 or more. Then it will activate each site as it is accessed the first time.

Step by Step

  1. Open IIS Manager
  2. Double Click Configuration Editor

  3. Select System.applicationHost/webLimits

  4. Set the value of dynamicRegistration Threshold to the new Treshold Value ( the default is : 100)
  5. Restart IIS


About HostForLIFE.eu

HostForLIFE.eu is European Windows Hosting Provider which focuses on Windows Platform only. We deliver on-demand hosting solutions including Shared hosting, Reseller Hosting, Cloud Hosting, Dedicated Servers, and IT as a Service for companies of all sizes.

We have offered the latest Windows 2016 Hosting, ASP.NET Core 2.2.1 Hosting, ASP.NET MVC 6 Hosting and SQL 2017 Hosting.


Tag cloud

Sign in