Most developers face a lot of problems while releasing a website in the production/hosting environment because they don't have experience with local IIS and custom domain names. IIS Express (localhost) provides developers with almost all the settings for development and debugging. Since most of the developers work with IIS Express, they have a lot of issues while working on the real server (hosting environment).

Instead of running, developing, and debugging (testing) a website using a localhost URL (like http://localhost:), local IIS (custom domain name) gives a good feel and looks professional. Setting a custom domain name instead of localhost will help you during website development, debugging, and its release.
Often, developers release security patches and updates to their customers. For this, they require the versioning of the domain. The virtual directory and application concept in IIS (Internet Information Services) helps developers to a version that I will also discuss in my article.
In this tutorial, I am going to explain various steps to change localhost to a custom domain name in IIS. This detailed article will cover the following topics as follows,
Introduction
Terminologies
Prerequisites
IIS Setup Configurations
Changing localhost to Custom Domain Name Configurations
Advanced Custom Domain Name Configurations
Conclusion
Terminologies
As per Wikipedia, "Internet Information Services (IIS, formerly Internet Information Server) is an extensible web server software created by Microsoft for use with the Windows NT family. IIS supports HTTP, HTTP/2, HTTPS, FTP, FTPS, SMTP and NNTP".
Application Pool
An application pool defines a group of one or more worker processes, configured with common settings that serve requests to one or more applications that are assigned to that application pool. Since application pools allow a set of web apps to share one or more similarly configured worker processes, they provide an easy way to isolate a group of web applications from other web applications on the server machine.
With the help of application pools, we can achieve the level of application isolation required in terms of availability and security by deploying applications across multiple application pools. Each worker process is separated by process boundaries. Therefore, problems with applications in one application pool have no effect on sites or applications in other application pools. Application pools significantly increase the dependability and management of your web infrastructure.
Site
A site is a container for applications and virtual directories that can be accessed through one or more unique bindings. Binding has two major communication properties:
Binding Protocol: It defines the protocol over which communication between the server and the client occurs. It can be either HTTP or HTTPS.
Binding Information: It defines the information that is used to access the site. It is the combination of IP address, port, and optional host header.
If a site requires different protocols or binding information, it may have more than one binding.
Note
In earlier versions of IIS, only the HTTP and HTTPS protocols were supported, but in IIS 7 and above, bindings can apply to any protocol.
Application
An application is a set of files that delivers content or provides services over a protocol, such as HTTP. When you create an application in IIS, the path to the application becomes part of the URL of the site.
Virtual Directory
A virtual directory is a directory name (also called a path) that you specify in IIS and mapped to a physical/virtual directory on the system.
Note
Virtual Directories aren't supported with ASP.NET Core apps. An ASP.NET Core app can be hosted as an IIS sub-application.
In short, a site can contain more than one application or virtual directory, an application can contain more than one application or virtual directory, and a virtual directory can contain more than one application.
Prerequisites
IIS (Internet Information Services)
Running Project (Here, I am using an ASP.NET web application).
Web Browser (Whatever you use, but I like Microsoft Edge)
IIS (Internet Information Services) Setup Configurations
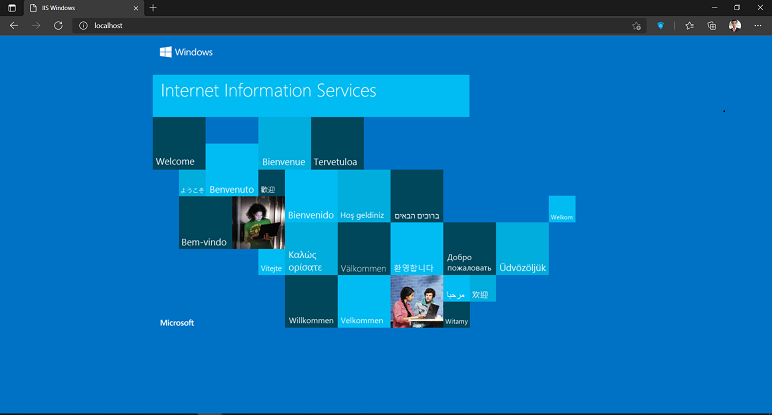
This section will tell you how to set up IIS (Internet Information Services) in your system. First of all, we have to check whether our system has IIS enabled or not? For this open any of your favorite browsers and just type the following URL, "IIS Windows".
If you get this page, it means that you have already enabled IIS in your system. So, you can skip this section and go to the next section.
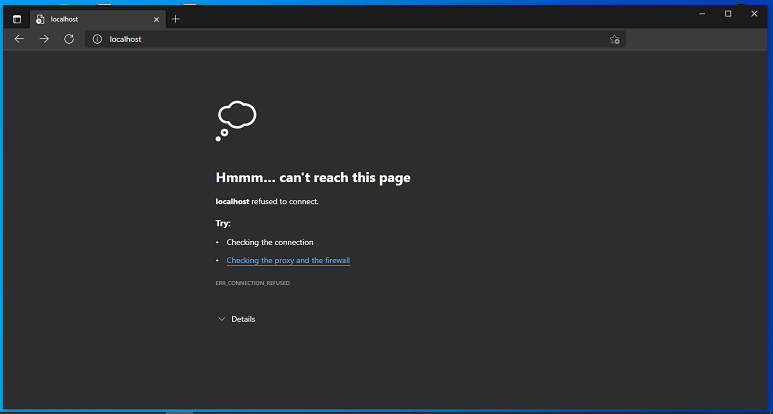
If you get this error, it means you need to enable it. So, stay with us and follow the steps given below very carefully. (Make sure you are connected to the Internet when configuring it).
Note
You can also check if you have IIS enabled on your system by searching for "IIS" in your Universal Search, which is next to the Start button.
Step 1
Click Start and type "Turn Windows features on or off" in the search bar. Then, click Turn Windows features on or off to open Windows Features.
Step 2
Search for "Internet Information Services" and check it and every box that appears in it needs to be checked. Click on the "OK" button to proceed.
+Setup+Configuration1.PNG)
Note
Make sure you have checked every box inside it. Because if some features are left, it will cause problems in IIS while mapping your application.
Step 3
After successful installation, a message will appear on the screen "Windows completed the requested changes". Now, click Close. (Now, you have to restart your system to apply all the changes).
+Setup+Configuration2.PNG)
After the system restarts, search for IIS again in your Universal Search Bar near the Start button. You will see the IIS as a result. Now, click on, to open it. (Alternatively, you can confirm it by typing the following URL, IIS Windows in any of your favorite browsers).
Congratulations, you have successfully enabled IIS in your system.
Changing Localhost to Custom Domain Name Configurations
Step 1
Click Start and type "IIS". Then click "Internet Information Services (IIS) Manager" to open the Internet Information Services (IIS) Manager.
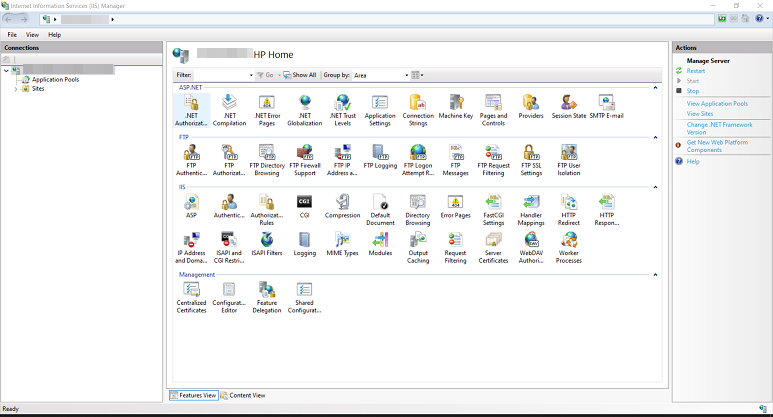
Step 2
First, we create a new application pool to host our new application. Follow steps 2a and 2b very carefully to create a new application pool.
Step 2a
Right-click on the Application Pools, and click on "Add Application Pool...".
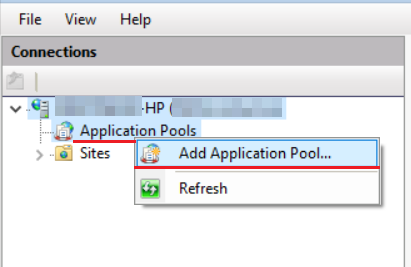
Step 2b
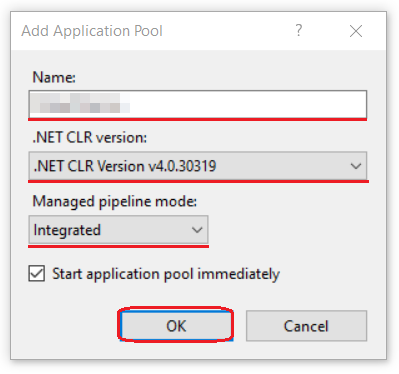
Now, create a new application pool by choosing the following configurations. (Note, if you are using the latest version of the .NET framework, select the following options).
Give a name to your new application pool
Select ".NET CLR Version v4.0.30319" option from .NET CLR Version
Select the "Integrated" option from Managed pipeline mode
Step 3
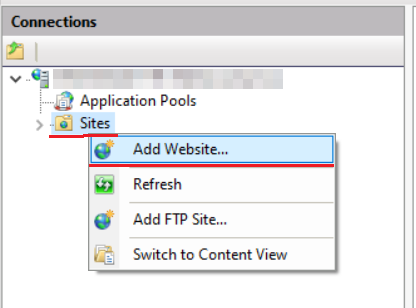
Right-click on the Sites and select the "Add Website..." option from the list.
Step 4
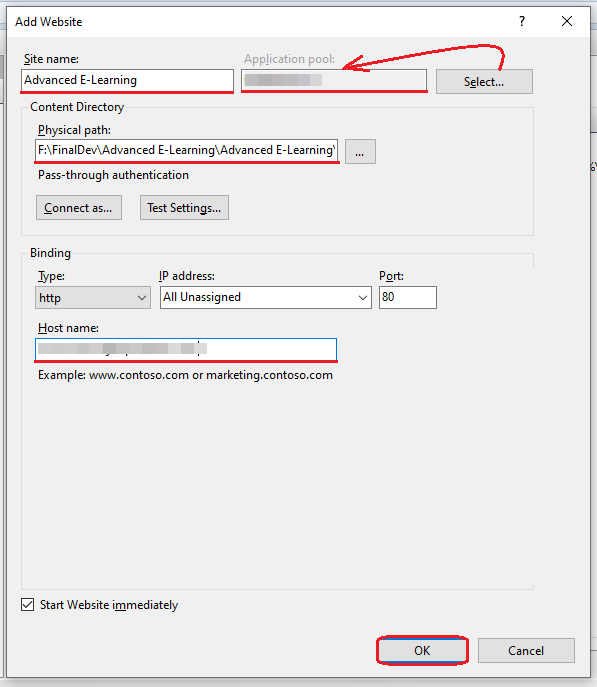
Now, enter the details as per the given fields and your requirements. And, click the "OK" button.
Site Name: Choose a name for your new website.
Application pool: Select the "Application pool" that you have created earlier, by clicking on the "Select" option.
Physical path: Select the main (root) directory of the application.
Host name: Now, it's time to set up your custom domain name. In the "Host name" field, type the custom domain name you want for your application.
Note
If you do not select the Application Pool, a new application pool is created using the name of the site when the site is added. IIS defaults to one application pool per site.
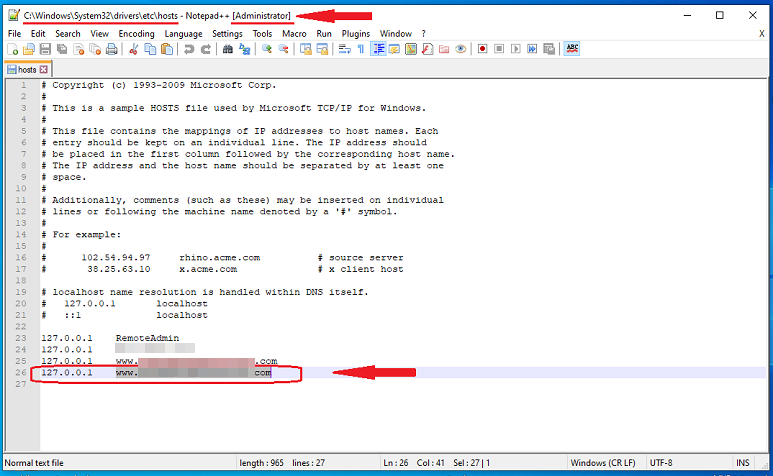
Step 5It's time to register/map your custom domain name with your local IP (127.0.0.1). To do this, navigate to the following path, "C:\Windows\System32\drivers\etc" and open the "hosts" file in any text editor with the Administrator privileges. Remember that, you will need administrator privileges to save your changes in the "hosts" file.
This is a sample HOSTS file used by Microsoft TCP/IP for Windows. This file contains the mappings of IP addresses to host names. Each entry should be kept on an individual line. The IP address should be placed in the first column followed by the corresponding host name. The IP address and the host name should be separated by at least one space. Additionally, comments may be inserted on individual lines or following the machine name denoted by a '#' symbol.
For example:
- 102.54.94.97 rhino.acme.com # source server
- 38.25.63.10 x.acme.com # x client host
Now, map your custom domain name as in the following example and save the file.
Congratulations, you have successfully changed localhost to the custom domain name for your application.