It is unnecessary to state the importance of having an automated backup strategy for your servers. Every server administrator has to go through the tiring job of setting up backups which include writing scripts, scheduling tasks, setting up alerts, and so on. To simplify this task, I have designed a simple utility to help server administrators and database administrators automate backups. This utility can automate MSSQL, MySQL, and Folder backups.
You are welcome to suggest new features or contribute your own.
Part 1 - Installing the utility
Download the setup file from the GitHub repository (Installer\bin folder)
Install on the server where you need to set up backups
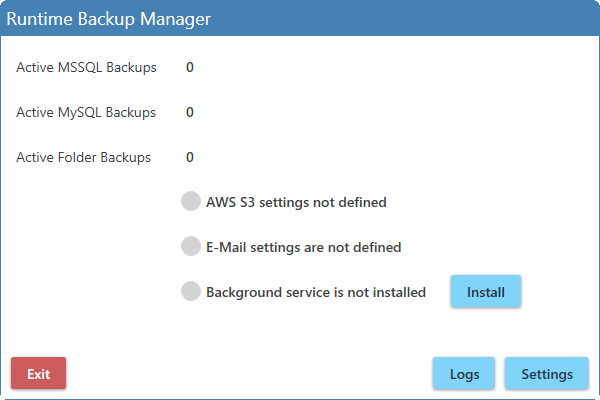
After you run the application, you will see the following screen:
Part 2 - Defining Backup Jobs
Click on the 'Settings' button on the bottom right to configure backup jobs.
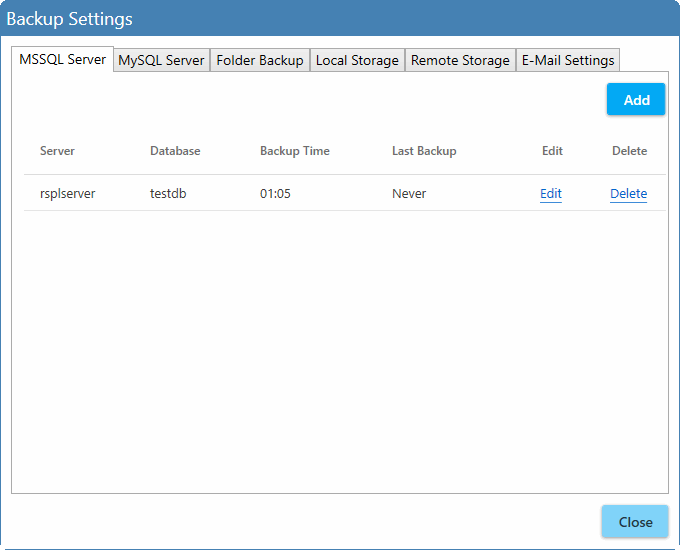
On the first tab, 'MSSQL Server', click on the 'Add' button to add a new MSSQL backup.
Define the server details as shown below. Check 'Enable Backup' and specify the backup time.
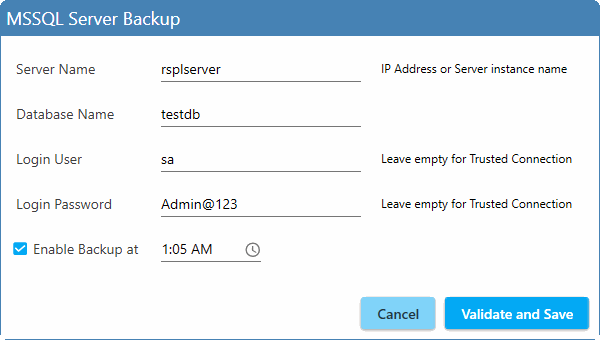
After entering the details, click on 'Validate and Save'. The utility will try to connect with the MSSQL Server using the given credentials. If the connection is successful, the entry will be saved and you will see it in the list as shown below,
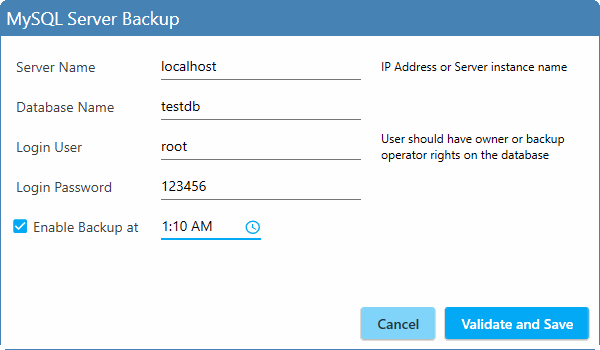
Similarly, go to the second tab 'MySQL Server', and click on the 'Add' button to add a MySQL backup.
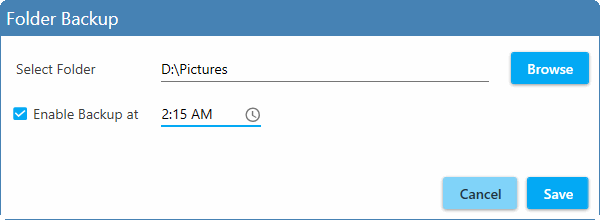
You can also backup specific server folders by using the 'Folder Backup' tab.
Part 3 - Specifying Local Storage Location
After defining the backup jobs, go to the 'Local Storage' tab and designate a folder on your server where you wish to store the backups.
Be careful that this folder should not be one of the backup folders, otherwise the program may behave unexpectedly.
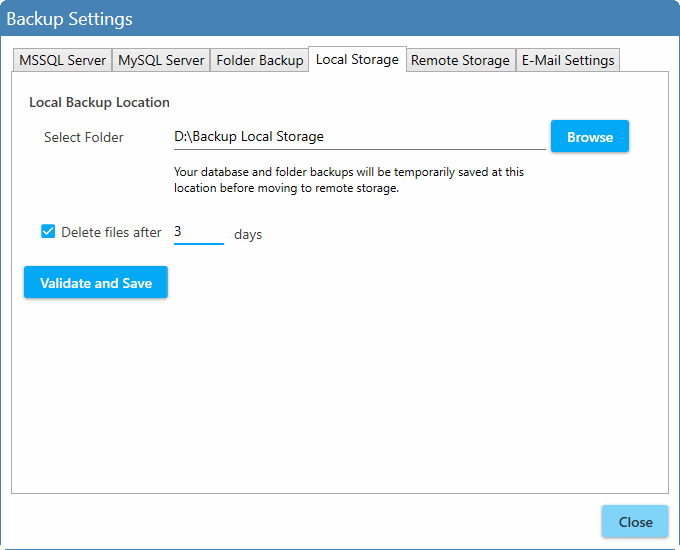
Since all backups will be stored in this folder, it is recommended to set an auto-delete policy as shown above. You can set a longer duration like 15 days or so as per your convenience.
Part 4 - Remote Storage
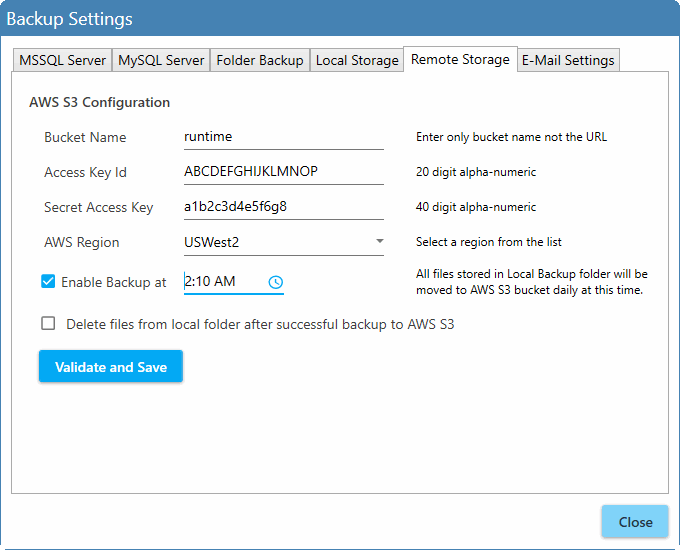
After backing up files locally on the server itself, we need to move them to remote storage.
Currently, the utility supports Amazon S3 backups. Go to the 'Remote Storage' tab and define your AWS credentials to automatically move files from 'Local Storage' to 'Remote Storage'.
Part 5 - E-Mail Alerts
You can easily set e-mail alerts to notify you of successful/failed backup jobs (both local and remote backups)
Click on the 'E-Mail Settings' tab and define your SMTP credentials as shown below.
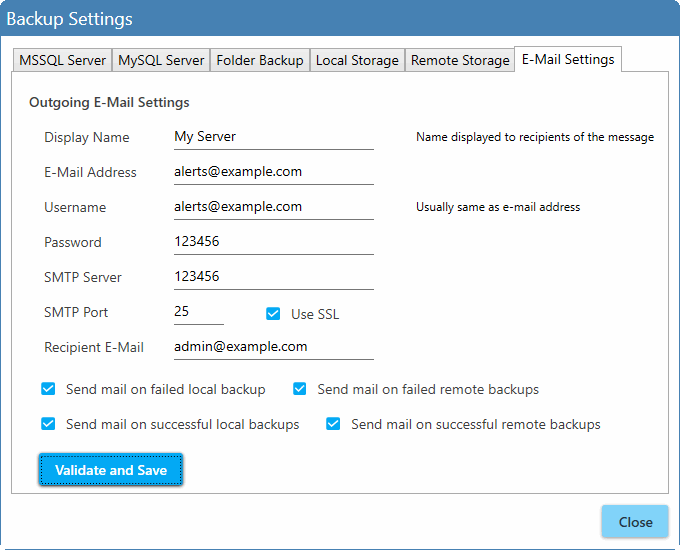
There are four types of alerts available:
Send mail on failed local backup
Send mail on failed remote backup
Send mail on successful local backup
Send mail on successful remote backup
Click on 'Validate and Save' to check your e-mail credentials. This will send a test mail to the 'Recipient E-Mail' address.
Click 'Close' to go back to the main screen.
The number of backups defined will appear here. It will also show the status of AWS S3 settings and E-Mail settings.
Click on the 'Install' button to install a backup service to process your jobs in the background.
This may take a couple of seconds. The status will change, as shown below:

To view logs, click on the 'Logs' button. Here you can find the logs of backup jobs and results for troubleshooting purposes.
After this, you can click on 'Exit' to close the User Interface.
The backup service will keep running in the background and will take care of defined backup jobs.
To verify the backup service status, open 'services.msc' and check for service name 'Runtime Backup Service'

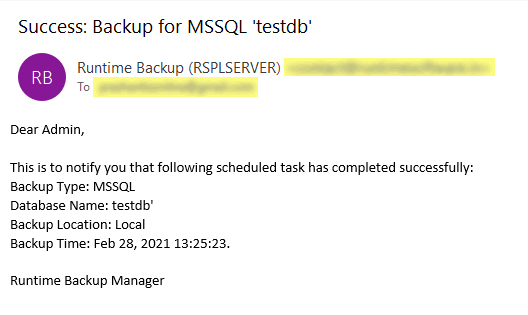
Here is a sample e-mail sent by the utility:
I hope this will help your business and save you lots of time in managing multiple backup scripts and configuring alerts.
Using this unified interface, you can automate your backup jobs easily.