IIS 7.5 and IIS 8.0 European Hosting

BLOG about IIS 7.5 Hosting, IIS 8.0 Hosting and Its Technology - Dedicated to European Windows Hosting Customer

IIS 8 Hosting - HostForLIFE :: Programmatically Create IIS Website and Application Pool Using C#

clock November 16, 2023 09:25 by author Peter

In this post, we will look at how to use a C# console application to create an IIS website and accompanying application pool programmatically. These tasks are typically performed by an IIS administrator.

We can use this application to automate those tasks. In Visual Studio 2010, construct a console application named IISAutomation and target.NET 3.5, as seen below.

Add a reference to Microsoft.Web.Administration, which may be found at C:WindowsSystem32inetsrv [IIS installation directory]. This assembly contains classes that can be used by a developer to administer the IIS Manager. First, we'll build an application pool with the code below:

private static void CreateAppPool(string pool name,bool enable32bitOn64, ManagedPipelineMode mode,string runtimeVersion="v4.0")
{
    using (ServerManager serverManager = new ServerManager())
    {
        ApplicationPool newPool = serverManager.ApplicationPools.Add(poolname);
        newPool.ManagedRuntimeVersion = runtimeVersion;
        newPool.Enable32BitAppOnWin64 = true;
        newPool.ManagedPipelineMode = mode;
        serverManager.CommitChanges();
    }
}


Here, we created an application pool by creating an instance of the application pool object. Then, we set the properties of the application pool, like the name, the .NET version to be used, and the committed changes by calling CommitChanges(). Similarly, we will create a website using the following code:
private static void CreateIISWebsite(string website name, string hostname, string phyPath, string app pool)
{
    ServerManager iisManager = new ServerManager();
    iisManager.Sites.Add(websiteName, "http", "*:80:" + hostname, phyPath);
    iisManager.Sites[websiteName].ApplicationDefaults.ApplicationPoolName = appPool;

    foreach (var item in iisManager.Sites[websiteName].Applications)
    {
        item.ApplicationPoolName = appPool;
    }

    iisManager.CommitChanges();
}

Here, we created a new website by creating an instance of ServerManager, adding it to the Sites collection setting its properties like name, physical path, and so on and committed the changes.

We will use the preceding methods in our Main method and create an application pool and a website using the following code:

static void Main(string[] args)
{
    Console.WriteLine("Do you want to create an Application Pool:y/n");
    string response = Console.ReadLine();
    if (response.ToString() == "y")
    {
        Console.Write("Please enter Application Pool Name:");
        string poolname = Console.ReadLine();
        bool isEnable32bit = false;
        ManagedPipelineMode mode = ManagedPipelineMode.Classic;
        Console.Write("Need to enable 32 bit on Windows 64 bit?y/n [Applicable for 64 bit OS]: y/n?");
        string enable32bit = Console.ReadLine();
        if (enable32bit.ToLower() == "y")
        {
            isEnable32bit = true;
        }
        Console.Write("Please select Pipeline Mode: 1 for Classic, 2 for Integrated:");
        string pipelinemode = Console.ReadLine();
        if (pipelinemode.ToLower() == "2")
        {
            mode = ManagedPipelineMode.Integrated;
        }
        Console.Write("Please select Runtime Version for Application Pool: 1 for v2.0, 2 for v4.0:");
        string runtimeVersion = Console.ReadLine()== "1" ? "v2.0" : "v4.0";

        CreateAppPool(poolname, isEnable32bit, mode, runtimeVersion);
        Console.WriteLine("Application Pool created successfully...");
    }
                Console.WriteLine("Do you want to create a website:y/n");
    response = Console.ReadLine();
    if (response.ToString() == "y")
    {
        Console.Write("Please enter website name:");
        string websiteName = Console.ReadLine();
        Console.Write("Please enter host name:");
        string hostname = Console.ReadLine();
        Console.Write("Please enter physical path to point for website:");
        string phypath = Console.ReadLine();
        Console.WriteLine("Please enter Application pool Name:");
        foreach(var pool in new ServerManager().ApplicationPools)
        {
            Console.WriteLine(pool.Name);
        }
        Console.WriteLine("");
        Console.Write("Please enter Application pool Name for web site:");
        string poolName = Console.ReadLine();
        CreateIISWebsite(websiteName,hostname,phypath,poolName);
        Console.WriteLine("Web site created successfully...");
        Console.ReadLine();
    }
}


Here, we set the attributes necessary for website and application creation by getting input from the console. Let's run the application and input the details as shown below:

We can develop websites and application pools more quickly and easily using this program. I'm wrapping things up here. I've attached the source code for your convenience. I hope everyone finds this article useful.


IIS 8 Hosting - HostForLIFE :: How Do I Deploy and Publish a.NET 7 Application in IIS?

clock August 22, 2023 12:50 by author Peter

This article walks you through the process of installing and publishing a.NET 7 application to Internet Information Services (IIS).


Step 1: Configure IIS (Optional)
If IIS is not already configured, we can use the procedures below to enable it.
Navigate to the Control Panel > Programs > Programs and Features > Turn on or off Windows features.
Increase the availability of Internet Information Services, World Wide Web Services, and Application Development Tools.

Step 2: On the IIS server, install the.NET Core Hosting Bundle.
Check that your server has IIS installed and configured correctly. Otherwise, you can proceed with the optional procedures listed above.
Ascertain that the required components for hosting.NET 7 applications are enabled. The hosting package includes the.NET Core Runtime,.NET Core Library, and the ASP.NET Core Module.

After installation, please restart the server.

Step 3: Save to a File Folder
Right-click the project you wish to deploy in Visual Studio and select publish.

Click on Folder > Next > Folder location will populate the default path as “bin\Release\net7.0\publish\”. > Click on Finish > Publish.

OPTIONAL - An alternative method for generating published files,
Navigate to the root directory of your.NET 7 project in a terminal.
To publish your application, use the following command:
dotnet publish -c Release -o PublishOutput

This will compile your application in Release mode and generate the necessary files in the Publish folder.

Step 4. Copy Files to Preferred IIS Location
Now, copy the published files to the location where they should be stored. In our case, let's copy the files to C:\inetpub\wwwroot\EmpoyeeAPI.


Step 5: In IIS, create an application and configure the application pool.
On your server, launch the IIS Manager.
To host your application, either create a new site or use an existing one. Select "Add Website" from the context menu when you right-click on the "Sites" node.
Provide a site name, a physical path (to the previous step's PublishOutput folder), and an optional hostname.

Because.NET 7 uses the.NET Core runtime, make sure the.NET CLR version is set to "No Managed Code."
Select Application Pools > Choose the name of the application pool > Configure the.NET CLR version to "No Managed Code" > Select "Integrated" as the pipeline mode.

Step 6. Test your app after deployment
After configuring the site, try accessing it through a web browser. Make sure everything is working as expected.

Important note: Because we are delivering Web API in our situation, the Swagger UI middleware is often retained within the app.Environment.Check the IsDevelopment() function. I kept this swagger middleware outside of this condition for demonstration purposes so that we could test the page in a browser.


IIS 8 Hosting - HostForLIFE :: ASP.NET Core Application Remote Debugging on a Remote IIS

clock July 26, 2023 08:45 by author Peter

You may have experienced the situation where your ASP.NET Core application runs smoothly while developed on your PC and in Visual Studio, but encounters issues and fails to produce the desired results when published on IIS. In this circumstance, remote debugging is precisely what can be helpful.

How does Remote Debugger function?
You can debug input requests to IIS through Visual Studio by using a remote debugger, which is positioned between IIS and Visual Studio and transmits queries from IIS to Visual Studio.

Before configuring Remote Debugger, please note the following considerations:

  • Remote Debugger is not available if the IIS machine and Visual Studio machine are connected through a proxy.
  • If the connection between the IIS machine and the Visual Studio machine has high latency or low bandwidth, then using Remote Debugger is not recommended.

Prerequisites

  • Install Remote Debugger on IIS machine
  • Check that the required ports are open in the firewall (by default, Port 4026 fot for Visual Studio 2022 or Port 4024 for Visual Studio 2019 and optionally UDP Port 3702 for discovery)
  • The application should be deployed to IIS using Debug configuration
  • The application deployed to IIS and the source code in Visual Studio should be exactly the same. Otherwise, the breakpoints in Visual Studio will not be hit.

How to Configure Remote Debugger?
1. Install Remote Debugger on the IIS machine. To install Remote Debugger, you can follow one of these two options:
If you have Visual Studio installed, then you can copy Remote Debugger from the Visual Studio installation path to the IIS machine. Remote Debugger usually is located in the following path: C:\Program Files\Microsoft Visual Studio\2022\Preview\Common7\IDE\Remote Debugger. If you have installed Visual Studio on other locations than the C:\Program Files, then you need to change the path respectively. Also, if you have installed Visual Studio other than the 2022 or Preview version, then the path should change respectively too.
Download the Remote Debugger and install it on an IIS machine.
You can download the Remote Debugger from the following url: Download Remote Debugger

2. Suppose that we have followed the first option so in order to start the Remote Debugger on the IIS machine, double click on msvsmon.exe to run the Remote Debugger. After running the msvsmon.exe following window will be opened:


As it is shown in the following image, Remote Debugger is up and waiting for new connections through port number 4026. In the following image, VAHID-LEGION is the name of the IIS server. Now that we have Remote Debugger up and run. Next, we need to go to the Visual Studio and try to connect to Remote Debugger.

3. In Visual Studio, go to Debug>Attach to Process

4. In Connection target, enter the IIS machine address as specified in msvsmon.exe and click on find.

3. Remote Connections window will be opened. In this window, select the IIS Machine and the click on Select button.


5. Wait until the connection is established and the process list is populated. From the process list, find the process associated with your website/web application in IIS. To easily find the process, you can enter w3wp in the search box to filter the process list. After finding the process on the IIS machine, select it and click on Attach.

6. If the Attach Security Warning window is shown, just click on Attach if you are sure to attach to the process.

7. Now, your website/web application on an IIS machine and your Visual Studio are connected to each other. You can now put a breakpoint in Visual Studio and start sending requests to IIS, to see that while processing the request, your breakpoints in Visual Studio are being hit.

Congratulation! you have successfully set up the Remote Debugger. But before you proceed, please note that you should not use this approach on production servers. because as you saw, breakpoints cause your application to be completely halted, and this can harm your application performance and usability. Just use this approach and similar approaches in test or staging environments.


IIS 8 Hosting - HostForLIFE :: ASP.NET MVC Application Deployment on IIS Server

clock June 20, 2023 08:22 by author Peter

Microsoft's Internet Information Services (IIS) is a flexible, general-purpose web server that delivers HTML pages or files requested on Windows computers.


Client workstations located remotely can submit queries to an IIS web server, which will then return the appropriate response. Using this foundational functionality, Web servers can share and distribute data across LANs, such as corporate intranets, and WANs, such as the Internet.

A web server can provide users with information in numerous formats, including HTML-coded static web pages, file downloads and uploads, text documents, and image files.
ASP.Net MVC Application Deployment on IIS Server

Step 1
Using Visual Studio, develop the ASP.net MVC application.

Select the Project Type as MVC and hit the create button.

Now our Project is in the initial Deployment stage.

Now our application is ready for Deployment on IIS Server.


Step 2
Now right click on the application and hit the publish option.

Step 3
Select the deployment options.

We will select the Folder option.


Create the Directory in your system for Application Build.

Select your folder for application build.

Hit the Finish button and we are good to go.


Our application build was created successfully.

Our Deployment Build is ready.

Step 4
Open the IIS Server.


Right click on the websites and add a new website. Give the name of the website and add the physical path for your application where you stored the application build. The next step will be to give the Hostname to your website (Simply the Domain Name)

Deploying Asp.net MVC Application on IIS Server

You can see the setting in the below screenshot.

Now click the OK button.

Step 5
Open the C Drive and find the system 32 Folder. Open the Driver Folder and after that, open the etc. folder and then open the Host File

C:\Windows\System32\drivers\etc

Open the Host file using Notepad.


Now open CMD and find your IP Address.
Set the IP Address and Host name in Host file in the way I am doing below.


Now go to IIS Server and browse your website.


Now our application is live on IIS Server.


IIS 8 Hosting - HostForLIFE :: Automating Database And Folder Backups On Windows Server

clock September 16, 2022 09:51 by author Peter

It is unnecessary to state the importance of having an automated backup strategy for your servers. Every server administrator has to go through the tiring job of setting up backups which include writing scripts, scheduling tasks, setting up alerts, and so on. To simplify this task, I have designed a simple utility to help server administrators and database administrators automate backups. This utility can automate MSSQL, MySQL, and Folder backups.

You are welcome to suggest new features or contribute your own.
 
Part 1 - Installing the utility

    Download the setup file from the GitHub repository (Installer\bin folder)
    Install on the server where you need to set up backups

After you run the application, you will see the following screen:

Part 2 - Defining Backup Jobs
Click on the 'Settings' button on the bottom right to configure backup jobs.
On the first tab, 'MSSQL Server', click on the 'Add' button to add a new MSSQL backup.
Define the server details as shown below. Check 'Enable Backup' and specify the backup time.

After entering the details, click on 'Validate and Save'. The utility will try to connect with the MSSQL Server using the given credentials. If the connection is successful, the entry will be saved and you will see it in the list as shown below,

Similarly, go to the second tab 'MySQL Server', and click on the 'Add' button to add a MySQL backup.


You can also backup specific server folders by using the 'Folder Backup' tab.

Part 3 - Specifying Local Storage Location
After defining the backup jobs, go to the 'Local Storage' tab and designate a folder on your server where you wish to store the backups.
Be careful that this folder should not be one of the backup folders, otherwise the program may behave unexpectedly.

Since all backups will be stored in this folder, it is recommended to set an auto-delete policy as shown above. You can set a longer duration like 15 days or so as per your convenience.
 
Part 4 - Remote Storage
After backing up files locally on the server itself, we need to move them to remote storage.
 
Currently, the utility supports Amazon S3 backups. Go to the 'Remote Storage' tab and define your AWS credentials to automatically move files from 'Local Storage' to 'Remote Storage'.


Part 5 - E-Mail Alerts
You can easily set e-mail alerts to notify you of successful/failed backup jobs (both local and remote backups)
Click on the 'E-Mail Settings' tab and define your SMTP credentials as shown below.

There are four types of alerts available:
    Send mail on failed local backup
    Send mail on failed remote backup
    Send mail on successful local backup
    Send mail on successful remote backup

Click on 'Validate and Save' to check your e-mail credentials. This will send a test mail to the 'Recipient E-Mail' address.
 
Click 'Close' to go back to the main screen.


The number of backups defined will appear here. It will also show the status of AWS S3 settings and E-Mail settings.
Click on the 'Install' button to install a backup service to process your jobs in the background.
This may take a couple of seconds. The status will change, as shown below:


To view logs, click on the 'Logs' button. Here you can find the logs of backup jobs and results for troubleshooting purposes.
After this, you can click on 'Exit' to close the User Interface.
The backup service will keep running in the background and will take care of defined backup jobs.
To verify the backup service status, open 'services.msc' and check for service name 'Runtime Backup Service'


Here is a sample e-mail sent by the utility:


I hope this will help your business and save you lots of time in managing multiple backup scripts and configuring alerts.
 
Using this unified interface, you can automate your backup jobs easily.


IIS 8 Hosting - HostForLIFE :: How To Change Localhost To Custom Domain Name In IIS?

clock September 9, 2022 08:55 by author Peter

Most developers face a lot of problems while releasing a website in the production/hosting environment because they don't have experience with local IIS and custom domain names. IIS Express (localhost) provides developers with almost all the settings for development and debugging. Since most of the developers work with IIS Express, they have a lot of issues while working on the real server (hosting environment).


Instead of running, developing, and debugging (testing) a website using a localhost URL (like http://localhost:), local IIS (custom domain name) gives a good feel and looks professional. Setting a custom domain name instead of localhost will help you during website development, debugging, and its release.

Often, developers release security patches and updates to their customers. For this, they require the versioning of the domain. The virtual directory and application concept in IIS (Internet Information Services) helps developers to a version that I will also discuss in my article.

In this tutorial, I am going to explain various steps to change localhost to a custom domain name in IIS. This detailed article will cover the following topics as follows,

    Introduction
    Terminologies
    Prerequisites
    IIS Setup Configurations
    Changing localhost to Custom Domain Name Configurations
    Advanced Custom Domain Name Configurations
    Conclusion

Terminologies
As per Wikipedia, "Internet Information Services (IIS, formerly Internet Information Server) is an extensible web server software created by Microsoft for use with the Windows NT family. IIS supports HTTP, HTTP/2, HTTPS, FTP, FTPS, SMTP and NNTP".

Application Pool
An application pool defines a group of one or more worker processes, configured with common settings that serve requests to one or more applications that are assigned to that application pool. Since application pools allow a set of web apps to share one or more similarly configured worker processes, they provide an easy way to isolate a group of web applications from other web applications on the server machine.

With the help of application pools, we can achieve the level of application isolation required in terms of availability and security by deploying applications across multiple application pools. Each worker process is separated by process boundaries. Therefore, problems with applications in one application pool have no effect on sites or applications in other application pools. Application pools significantly increase the dependability and management of your web infrastructure.

Site
A site is a container for applications and virtual directories that can be accessed through one or more unique bindings. Binding has two major communication properties:

    Binding Protocol: It defines the protocol over which communication between the server and the client occurs. It can be either HTTP or HTTPS.
    Binding Information: It defines the information that is used to access the site. It is the combination of IP address, port, and optional host header.

If a site requires different protocols or binding information, it may have more than one binding.

Note
In earlier versions of IIS, only the HTTP and HTTPS protocols were supported, but in IIS 7 and above, bindings can apply to any protocol.

Application
An application is a set of files that delivers content or provides services over a protocol, such as HTTP. When you create an application in IIS, the path to the application becomes part of the URL of the site.

Virtual Directory
A virtual directory is a directory name (also called a path) that you specify in IIS and mapped to a physical/virtual directory on the system.

Note
Virtual Directories aren't supported with ASP.NET Core apps. An ASP.NET Core app can be hosted as an IIS sub-application.

In short, a site can contain more than one application or virtual directory, an application can contain more than one application or virtual directory, and a virtual directory can contain more than one application.

Prerequisites

    IIS (Internet Information Services)
    Running Project (Here, I am using an ASP.NET web application).
    Web Browser (Whatever you use, but I like Microsoft Edge)

IIS (Internet Information Services) Setup Configurations

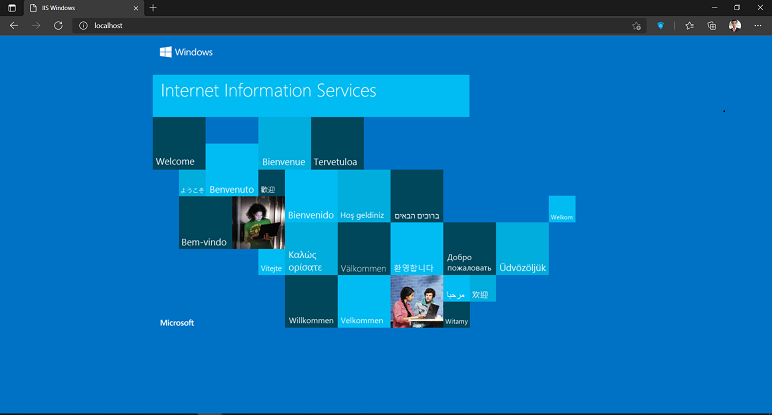
This section will tell you how to set up IIS (Internet Information Services) in your system. First of all, we have to check whether our system has IIS enabled or not? For this open any of your favorite browsers and just type the following URL, "IIS Windows".

If you get this page, it means that you have already enabled IIS in your system. So, you can skip this section and go to the next section.

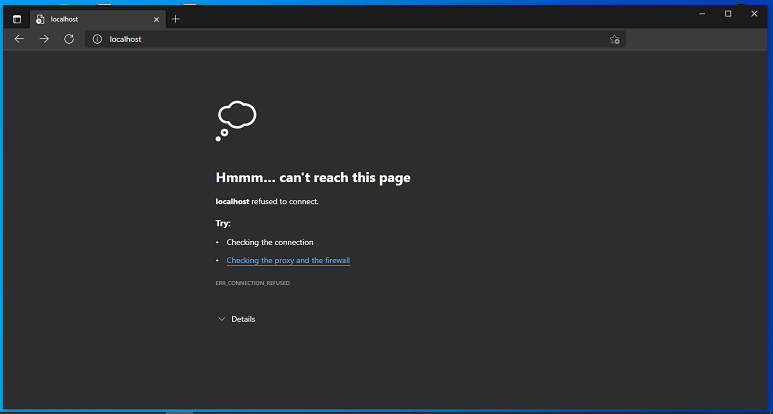
If you get this error, it means you need to enable it. So, stay with us and follow the steps given below very carefully. (Make sure you are connected to the Internet when configuring it).

Note
You can also check if you have IIS enabled on your system by searching for "IIS" in your Universal Search, which is next to the Start button.

Step 1
Click Start and type "Turn Windows features on or off" in the search bar. Then, click Turn Windows features on or off to open Windows Features.

Step 2
Search for "Internet Information Services" and check it and every box that appears in it needs to be checked. Click on the "OK" button to proceed.

Note
Make sure you have checked every box inside it. Because if some features are left, it will cause problems in IIS while mapping your application.

Step 3

After successful installation, a message will appear on the screen "Windows completed the requested changes". Now, click Close. (Now, you have to restart your system to apply all the changes).

After the system restarts, search for IIS again in your Universal Search Bar near the Start button. You will see the IIS as a result. Now, click on, to open it. (Alternatively, you can confirm it by typing the following URL, IIS Windows in any of your favorite browsers).

Congratulations, you have successfully enabled IIS in your system.

Changing Localhost to Custom Domain Name Configurations
Step 1
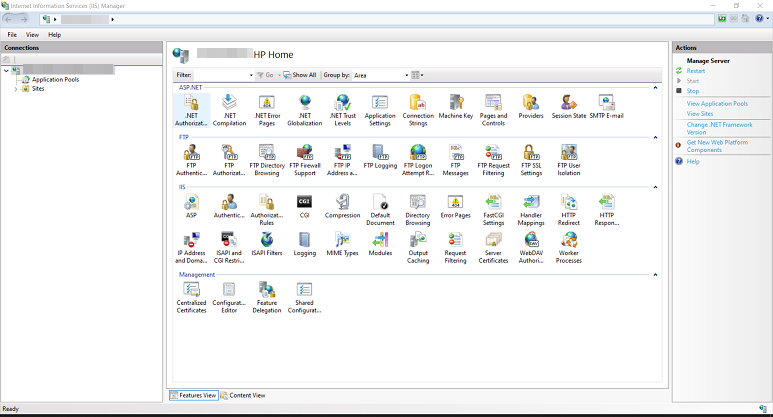
Click Start and type "IIS". Then click "Internet Information Services (IIS) Manager" to open the Internet Information Services (IIS) Manager.

Step 2
First, we create a new application pool to host our new application. Follow steps 2a and 2b very carefully to create a new application pool.
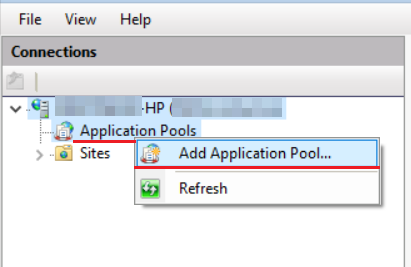
Step 2a
Right-click on the Application Pools, and click on "Add Application Pool...".

Step 2b
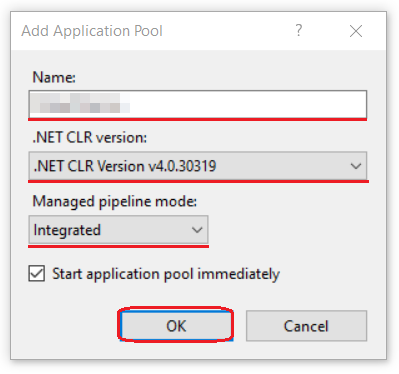
Now, create a new application pool by choosing the following configurations. (Note, if you are using the latest version of the .NET framework, select the following options).
    Give a name to your new application pool
    Select ".NET CLR Version v4.0.30319" option from .NET CLR Version
    Select the "Integrated" option from Managed pipeline mode

Step 3
Right-click on the Sites and select the "Add Website..." option from the list.

Step 4
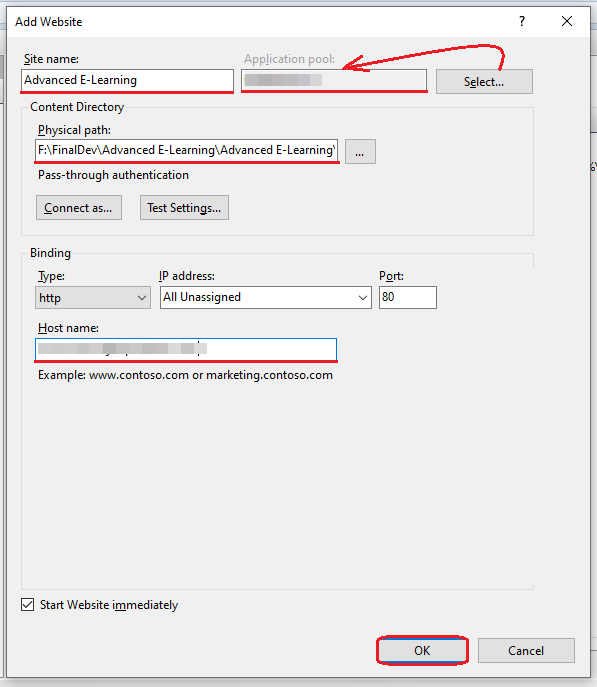
Now, enter the details as per the given fields and your requirements. And, click the "OK" button.

    Site Name: Choose a name for your new website.
    Application pool: Select the "Application pool" that you have created earlier, by clicking on the "Select" option.
    Physical path: Select the main (root) directory of the application.
    Host name: Now, it's time to set up your custom domain name. In the "Host name" field, type the custom domain name you want for your application.

Note
If you do not select the Application Pool, a new application pool is created using the name of the site when the site is added. IIS defaults to one application pool per site.

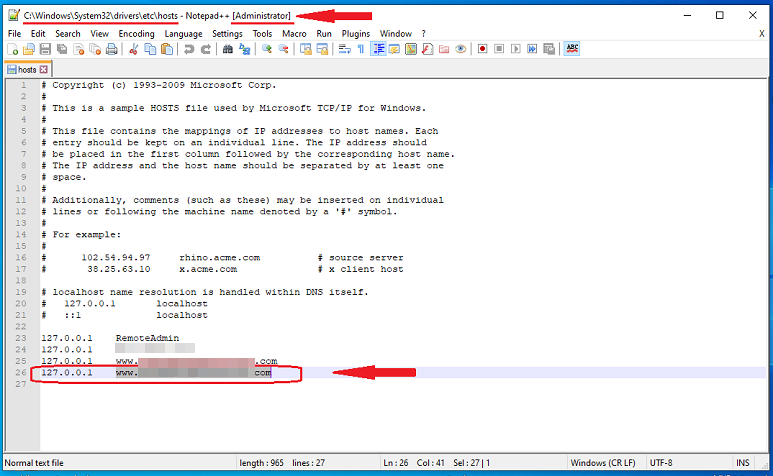
Step 5It's time to register/map your custom domain name with your local IP (127.0.0.1). To do this, navigate to the following path, "C:\Windows\System32\drivers\etc" and open the "hosts" file in any text editor with the Administrator privileges. Remember that, you will need administrator privileges to save your changes in the "hosts" file.

This is a sample HOSTS file used by Microsoft TCP/IP for Windows. This file contains the mappings of IP addresses to host names. Each entry should be kept on an individual line. The IP address should be placed in the first column followed by the corresponding host name. The IP address and the host name should be separated by at least one space. Additionally, comments may be inserted on individual lines or following the machine name denoted by a '#' symbol.

For example:

  • 102.54.94.97     rhino.acme.com      # source server
  • 38.25.63.10       x.acme.com           # x client host

Now, map your custom domain name as in the following example and save the file.


Congratulations, you have successfully changed localhost to the custom domain name for your application.


IIS 8 Hosting - HostForLIFE.eu :: Running an ASP.NET MVC Application on IIS 8

clock April 3, 2020 08:04 by author Peter

IIS has ever increasing amounts of security, you can’t publish a basic ASP.NET MVC website anymore and expect IIS 8 to host it without some additional work. The default config settings that the MVC uses are locked down in IIS, so it issues an error when you try to navigate to your fresh site.

Initially you may get a screen that says something bland and non-descriptive, like “Internal Server Error” with no further information. To get the more detailed error messages modify your web application’s web.config file and add the following line to the system.webServer section:

<httpErrors errorMode="Detailed" />

Now, you’ll get a more detailed error message. It will look something like this:


The key to the message is: This configuration section cannot be used at this path. This happens when the section is locked at a parent level. Locking is either by default (overrideModeDefault="Deny"), or set explicitly by a location tag with overrideMode="Deny" or the legacy allowOverride="false".

The “Config Source” section of the error message will highlight in red the part that is denied.

In order to allow the web.config to modify the the identified configuration element you need to find and modify the ApplicationHost.config file. It is located in C:\Windows\System32\inetsrv\config. You’ll need to be running as an Administrator level user in order to modify the file.

Find the section group the setting belongs to, e.g.

<sectionGroup name="system.webServer">

Then the section itself:

<section name="handlers" overrideModeDefault="Deny" />

And update overrideModeDefault to "Allow" in order to allow the web.config to override it.

When you refresh the page for the website the error will be gone (or replaced with an error for the next section that you are not permitted to override)


About HostForLIFE.eu

HostForLIFE.eu is European Windows Hosting Provider which focuses on Windows Platform only. We deliver on-demand hosting solutions including Shared hosting, Reseller Hosting, Cloud Hosting, Dedicated Servers, and IT as a Service for companies of all sizes.

We have offered the latest Windows 2016 Hosting, ASP.NET Core 2.2.1 Hosting, ASP.NET MVC 6 Hosting and SQL 2017 Hosting.


Tag cloud

Sign in