In this post, we will look at how to use a C# console application to create an IIS website and accompanying application pool programmatically. These tasks are typically performed by an IIS administrator.

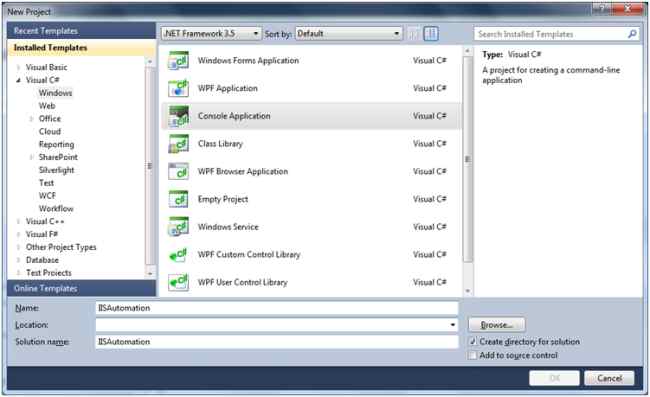
We can use this application to automate those tasks. In Visual Studio 2010, construct a console application named IISAutomation and target.NET 3.5, as seen below.
Add a reference to Microsoft.Web.Administration, which may be found at C:WindowsSystem32inetsrv [IIS installation directory]. This assembly contains classes that can be used by a developer to administer the IIS Manager. First, we'll build an application pool with the code below:
private static void CreateAppPool(string pool name,bool enable32bitOn64, ManagedPipelineMode mode,string runtimeVersion="v4.0")
{
using (ServerManager serverManager = new ServerManager())
{
ApplicationPool newPool = serverManager.ApplicationPools.Add(poolname);
newPool.ManagedRuntimeVersion = runtimeVersion;
newPool.Enable32BitAppOnWin64 = true;
newPool.ManagedPipelineMode = mode;
serverManager.CommitChanges();
}
}
Here, we created an application pool by creating an instance of the application pool object. Then, we set the properties of the application pool, like the name, the .NET version to be used, and the committed changes by calling CommitChanges(). Similarly, we will create a website using the following code:
private static void CreateIISWebsite(string website name, string hostname, string phyPath, string app pool)
{
ServerManager iisManager = new ServerManager();
iisManager.Sites.Add(websiteName, "http", "*:80:" + hostname, phyPath);
iisManager.Sites[websiteName].ApplicationDefaults.ApplicationPoolName = appPool;
foreach (var item in iisManager.Sites[websiteName].Applications)
{
item.ApplicationPoolName = appPool;
}
iisManager.CommitChanges();
}
Here, we created a new website by creating an instance of ServerManager, adding it to the Sites collection setting its properties like name, physical path, and so on and committed the changes.
We will use the preceding methods in our Main method and create an application pool and a website using the following code:
static void Main(string[] args)
{
Console.WriteLine("Do you want to create an Application Pool:y/n");
string response = Console.ReadLine();
if (response.ToString() == "y")
{
Console.Write("Please enter Application Pool Name:");
string poolname = Console.ReadLine();
bool isEnable32bit = false;
ManagedPipelineMode mode = ManagedPipelineMode.Classic;
Console.Write("Need to enable 32 bit on Windows 64 bit?y/n [Applicable for 64 bit OS]: y/n?");
string enable32bit = Console.ReadLine();
if (enable32bit.ToLower() == "y")
{
isEnable32bit = true;
}
Console.Write("Please select Pipeline Mode: 1 for Classic, 2 for Integrated:");
string pipelinemode = Console.ReadLine();
if (pipelinemode.ToLower() == "2")
{
mode = ManagedPipelineMode.Integrated;
}
Console.Write("Please select Runtime Version for Application Pool: 1 for v2.0, 2 for v4.0:");
string runtimeVersion = Console.ReadLine()== "1" ? "v2.0" : "v4.0";
CreateAppPool(poolname, isEnable32bit, mode, runtimeVersion);
Console.WriteLine("Application Pool created successfully...");
}
Console.WriteLine("Do you want to create a website:y/n");
response = Console.ReadLine();
if (response.ToString() == "y")
{
Console.Write("Please enter website name:");
string websiteName = Console.ReadLine();
Console.Write("Please enter host name:");
string hostname = Console.ReadLine();
Console.Write("Please enter physical path to point for website:");
string phypath = Console.ReadLine();
Console.WriteLine("Please enter Application pool Name:");
foreach(var pool in new ServerManager().ApplicationPools)
{
Console.WriteLine(pool.Name);
}
Console.WriteLine("");
Console.Write("Please enter Application pool Name for web site:");
string poolName = Console.ReadLine();
CreateIISWebsite(websiteName,hostname,phypath,poolName);
Console.WriteLine("Web site created successfully...");
Console.ReadLine();
}
}
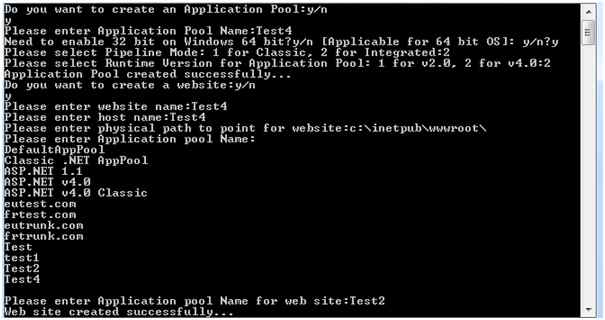
Here, we set the attributes necessary for website and application creation by getting input from the console. Let's run the application and input the details as shown below:
We can develop websites and application pools more quickly and easily using this program. I'm wrapping things up here. I've attached the source code for your convenience. I hope everyone finds this article useful.