IIS 7.5 and IIS 8.0 European Hosting

BLOG about IIS 7.5 Hosting, IIS 8.0 Hosting and Its Technology - Dedicated to European Windows Hosting Customer

IIS Hosting Europe - HostForLIFE :: Ensure Correct URL Redirection in ASP.NET on IIS with R

clock September 30, 2026 12:18 by author Peter

This is the problem you are having with Response.The way the path is being resolved in the IIS environment is probably the cause of Redirect's incorrect inclusion of the myApp root folder in the URL. Here's how to make it right:

1. 1. Use.Reroute
ResolveUrl ensures that the myApp folder is included in the URL by assisting in determining the right path based on the application root.

protected void Test_RedirectSSM(object sender, EventArgs e)
{
    string url = ResolveUrl("~/UserPages/TestareSSM.aspx");
    Response.Redirect(url);
}


2. Use Request.ApplicationPath
Another approach is to manually build the URL using Request.ApplicationPath, which will ensure that the application’s root folder (myApp) is correctly prefixed in the URL.
protected void Test_RedirectSSM(object sender, EventArgs e)
{
    string url = $"{Request.ApplicationPath}/UserPages/TestareSSM.aspx";
    Response.Redirect(url);
}


3. Absolute Path

If you are dealing with a situation where you must use an absolute path, ensure you correctly structure it, including the full application path:

protected void Test_RedirectSSM(object sender, EventArgs e)
{
    Response.Redirect("https://iis/myApp/UserPages/TestareSSM.aspx");
}


Summary
ResolveUrl("~/...") is often the most reliable and easiest way to ensure URLs are correctly resolved relative to the application root.
Request.ApplicationPath can be used to dynamically construct paths based on where your application is deployed.
Ensure that any absolute URLs used include the entire path, including the myApp portion.

These approaches should help ensure that the redirect URL correctly includes your application's root folder (myApp) when deploying on IIS.


IIS Hosting Europe - HostForLIFE :: Why Do We Need GZip? (And why IIS automatically gives you GZip in .NET applications)

clock September 17, 2026 12:58 by author Peter

Before data is transmitted over the internet, it is compressed using a widely used technique called GZip. Its primary goal is straightforward: reduce the size of web replies to speed up loading times.

Today, a vast quantity of text-based data, including HTML, JSON, CSS, JavaScript, XML, and more, is sent by web apps. All of this information is sent across the network each time a user accesses a webpage or API. Your program will immediately become slower and feel heavier if these files are huge.

This issue is resolved by GZip compression, which shrinks the answer before it leaves the server.

1. Faster Applications Through Smaller Responses

Most content sent from a server is text, and text compresses extremely well. With GZip, responses can shrink by 60–90%, often even more.

For example:

TypeOriginal SizeAfter GZip

JSON API

150 KB

20 KB

HTML Page

100 KB

15 KB

CSS File

50 KB

7 KB

2. Lower Bandwidth and Hosting Costs
Every byte you send costs something, especially in cloud environments.

When responses are compressed:

  • Servers send less data
  • Cloud bandwidth usage drops
  • API traffic becomes cheaper
  • Users save mobile data
  • Applications scale better with lower load

For high-traffic APIs, this becomes a huge cost-saving advantage.

3. Better SEO and Web Performance
Google cares deeply about speed. Faster websites rank better and deliver better Core Web Vitals, such as:

  • LCP (Largest Contentful Paint)
  • FCP (First Contentful Paint)
  • Overall loading experience

GZip improves these metrics automatically because it reduces how much content must be downloaded.

In .NET Core, GZip Works Automatically When Hosted on IIS
When a .NET Core application runs behind IIS or IIS Express, you automatically get GZip compression without writing any code. This is because IIS applies compression through its built-in StaticCompressionModule and DynamicCompressionModule, which run before the request reaches your .NET Core application.

So:

  • You do not need to add AddResponseCompression()
  • You do not need to configure any middleware
  • IIS provides GZip automatically for all .NET apps, including .NET Core and .NET 6/7/8
  • Visual Studio also uses IIS Express → so compression appears automatically during development

GZip seems like a .NET Core feature, but it is actually IIS doing the work, not the .NET runtime.

GZip is one of the easiest and most impactful optimizations you can use in .NET applications—and understanding how IIS and .NET handle it helps ensure your application performs consistently across all environments. 


IIS Hosting Europe - HostForLIFE :: How to Set Up IIS Web Server on a Virtual Machine (Windows Server)

clock September 1, 2026 13:09 by author Peter

How to Set Up IIS Web Server in a Virtual Machine
Internet Information Services is referred to as IIS. It is a Microsoft web server. Websites and web apps are hosted on a Windows server using IIS. We will use Server Manager to install IIS on a virtual machine in this article.

First, launch Server Manager.
First, use an administrator account to access the virtual machine server.
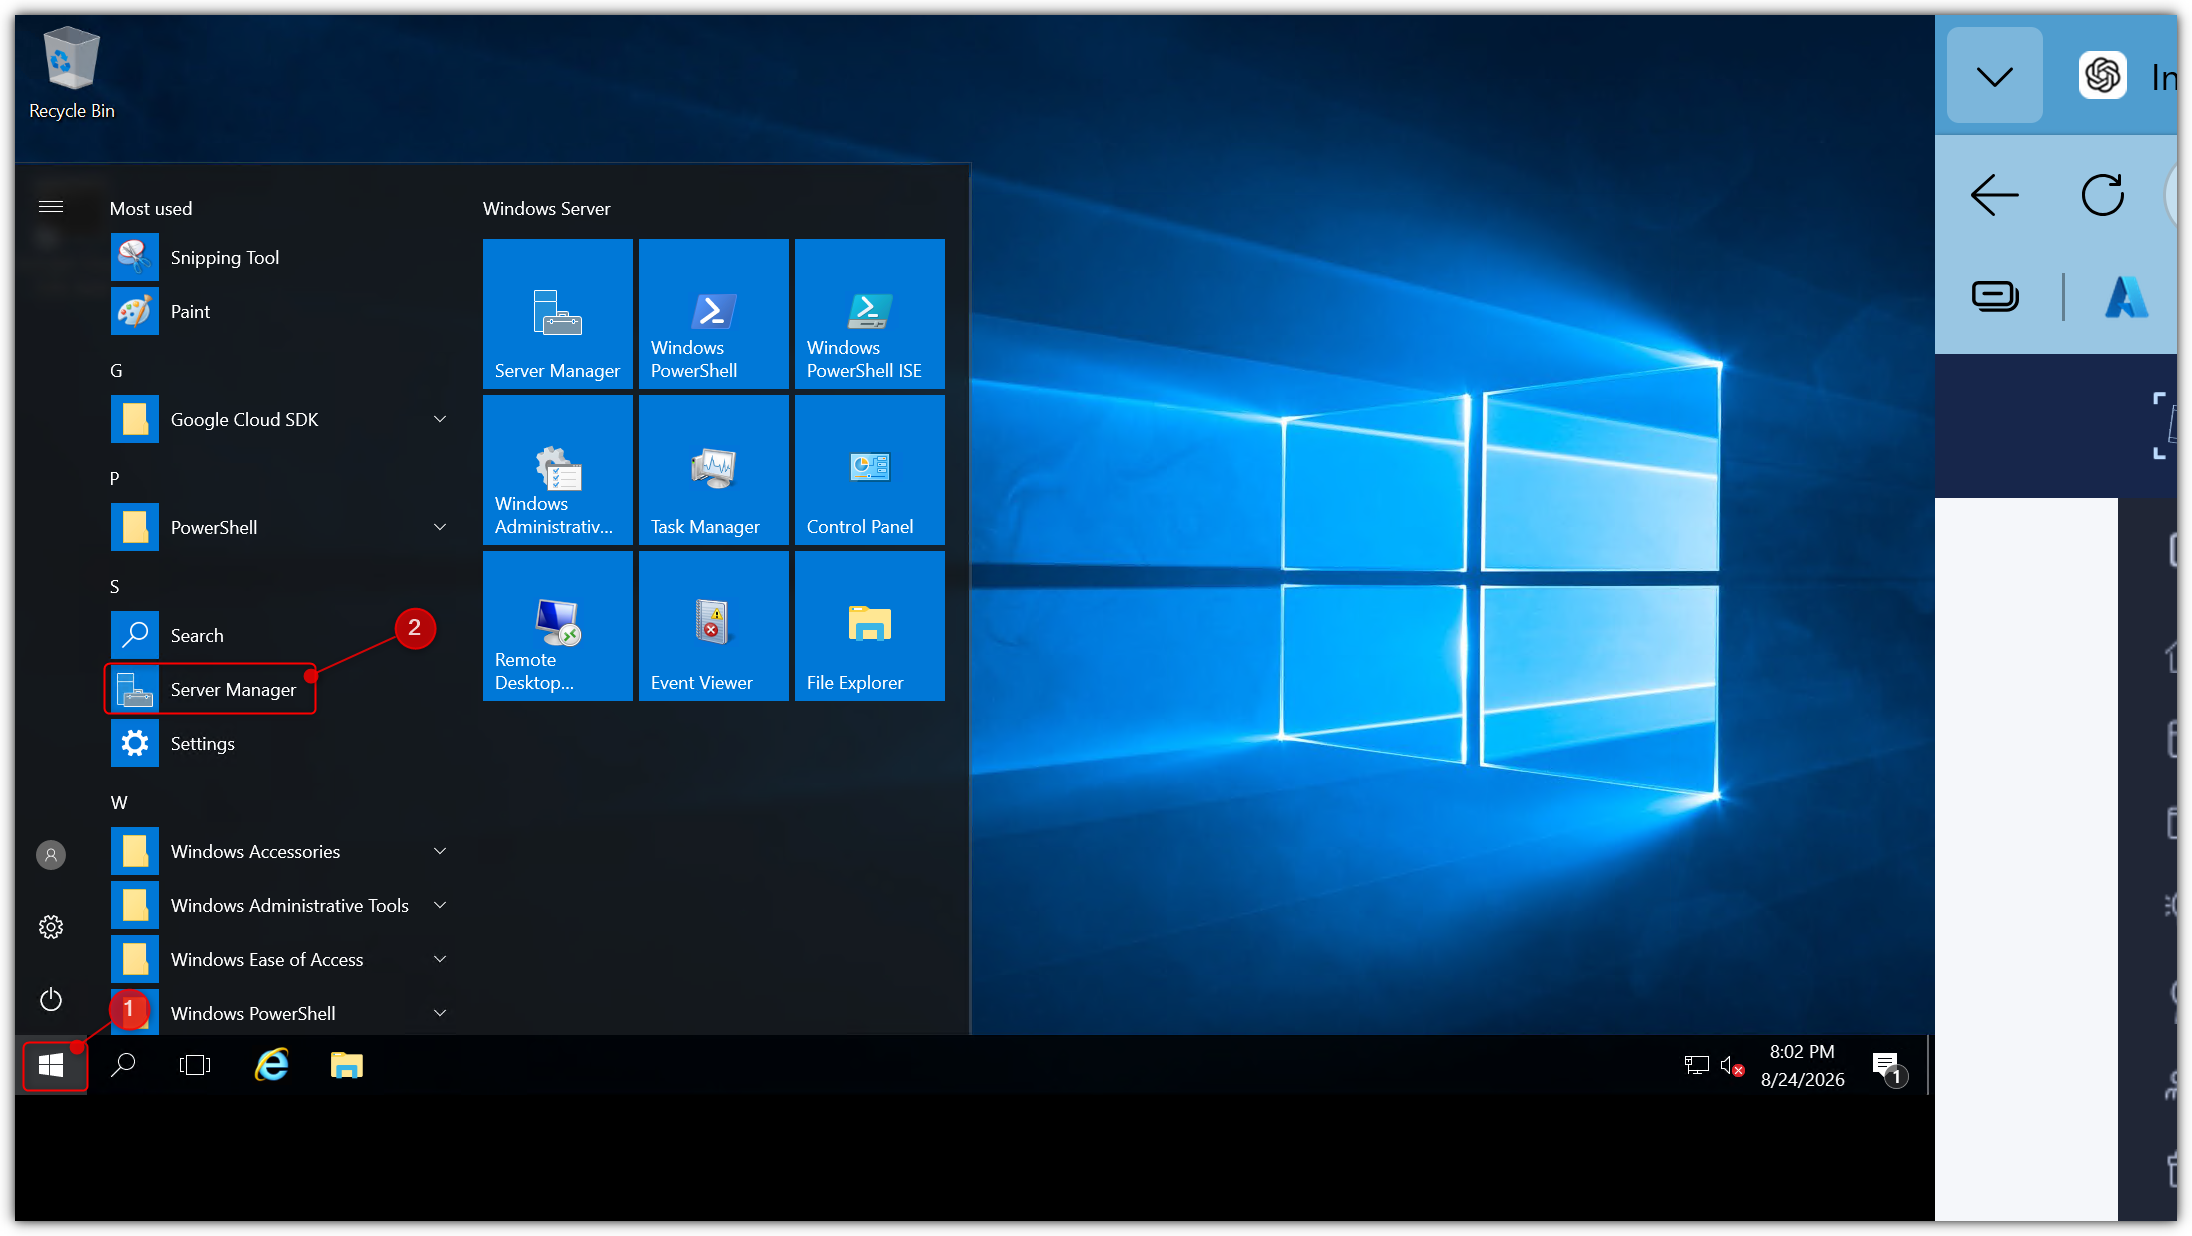
From the Start menu, launch Server Manager. The Windows Server may be managed and various server roles and functionality installed using Server Manager.
Step 2: Add Roles and Features
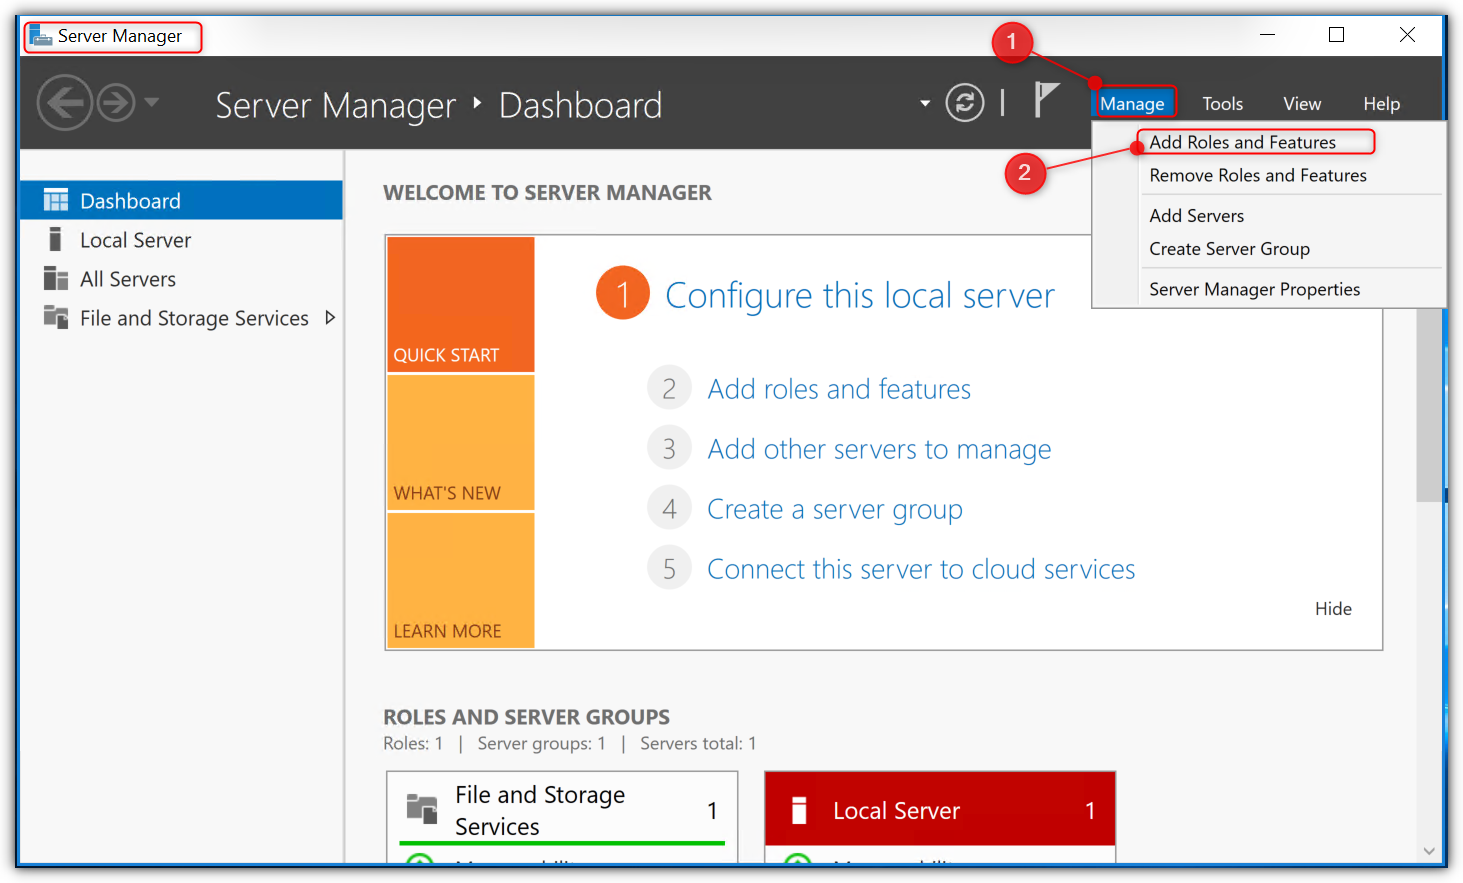
In Server Manager, click Manage at the top.
Select Add Roles and Features from the menu.
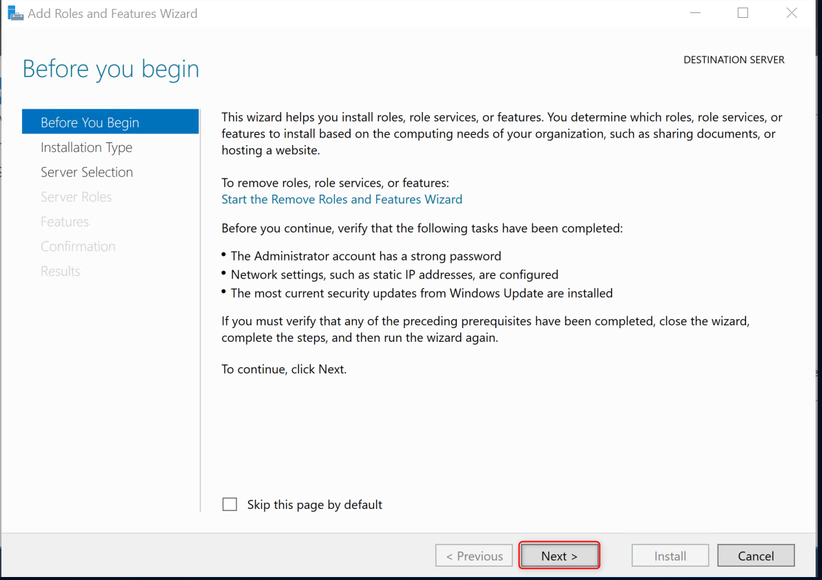
The Add Roles and Features Wizard will open. Click Next to continue.
Step 3: Select Installation Type
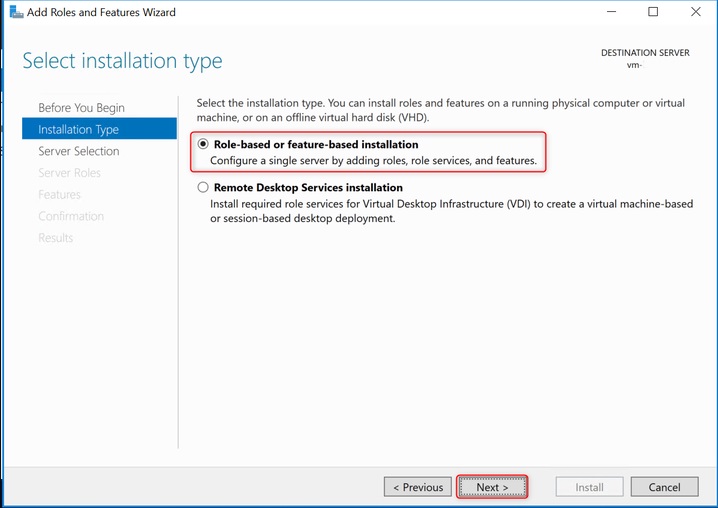
On the Installation Type page, keep the default option Role-based or feature-based installation selected.
This option allows us to install a server role such as IIS.

Click Next.
Step 4: Select the Server
On the Server Selection page, select VM Server from the server list.
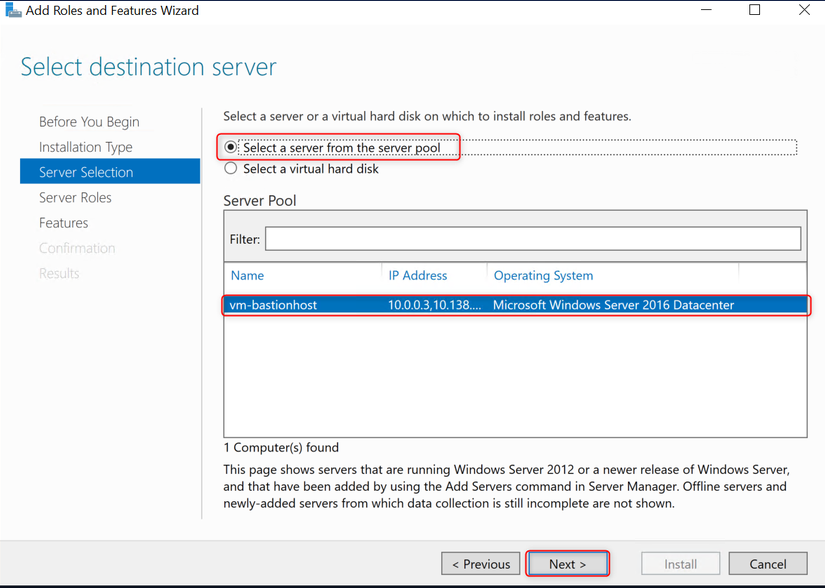
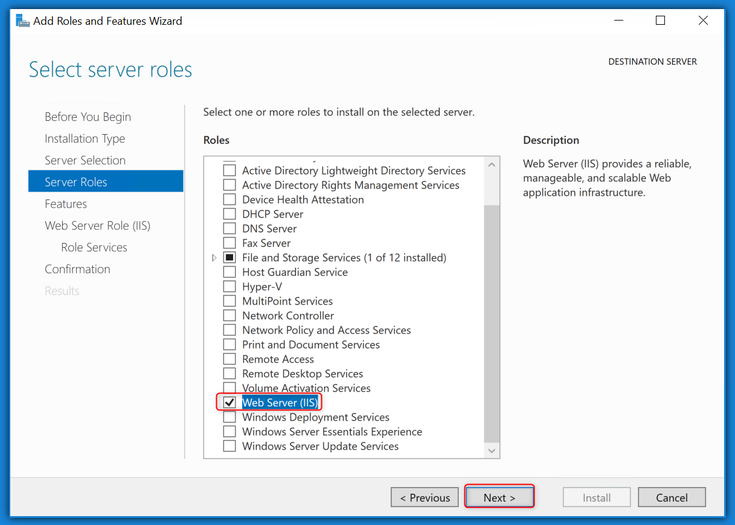
Step 5: Select Web Server (IIS)
On the Server Roles page, find Web Server (IIS).
Select the checkbox next to Web Server (IIS).

A small popup window will appear. This window shows the features needed for IIS.

Click Add Features.

Then click Next.
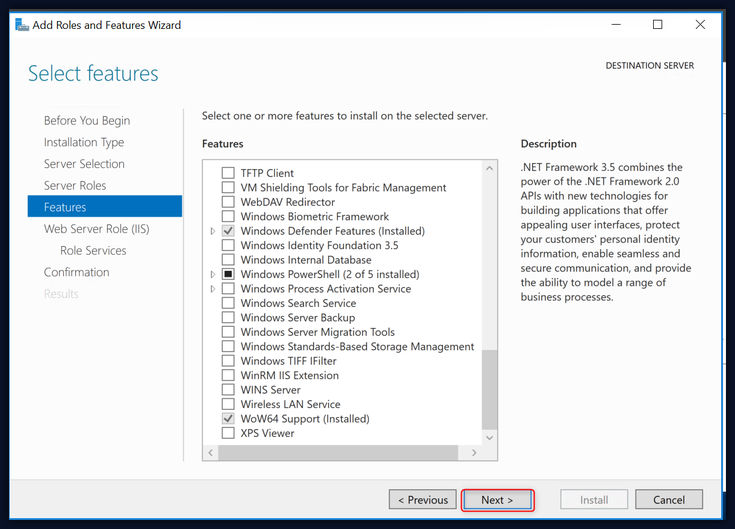
Keep default and Click Next to continue.
Click Next to continue.
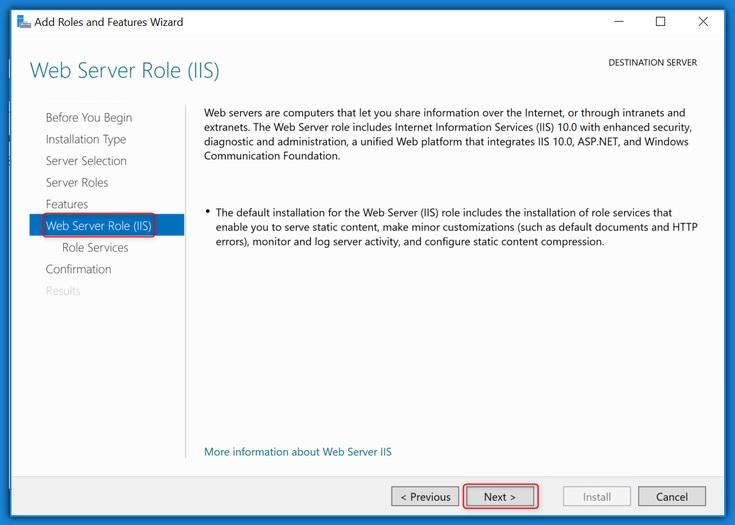
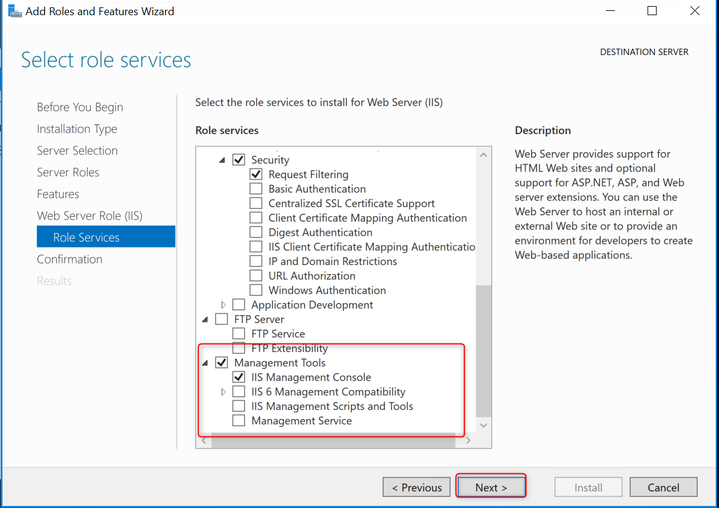
Make sure all required Role service selected
Then Click Next to continue.

Step 6: Continue with the Installation
The wizard will show the Features and IIS configuration pages.
For a basic IIS installation, we can keep the default settings.
Click Next through the remaining pages until you reach the Confirmation page.
Step 7: Install IIS
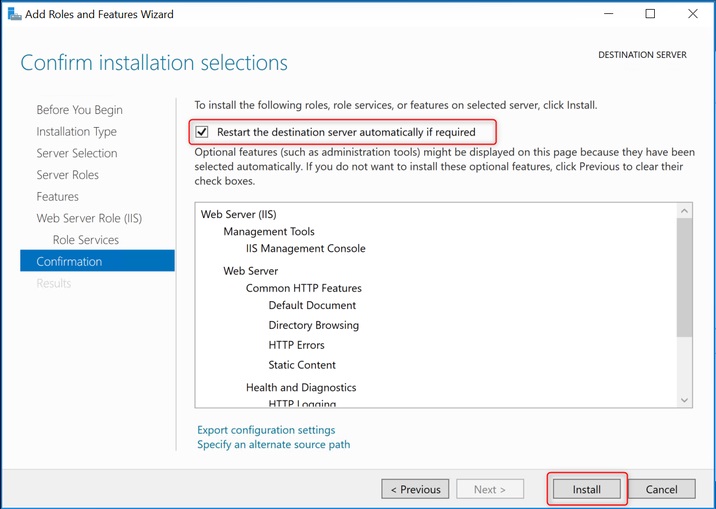
On the Confirmation page, check the selected options.
Make sure Web Server (IIS) is selected.
Click Install to start the installation.
Wait for the installation to finish. The installation may take a few minutes.
When the installation is complete, click Close.
Step 8: Check IIS
After installing IIS, we can check if it is working correctly.
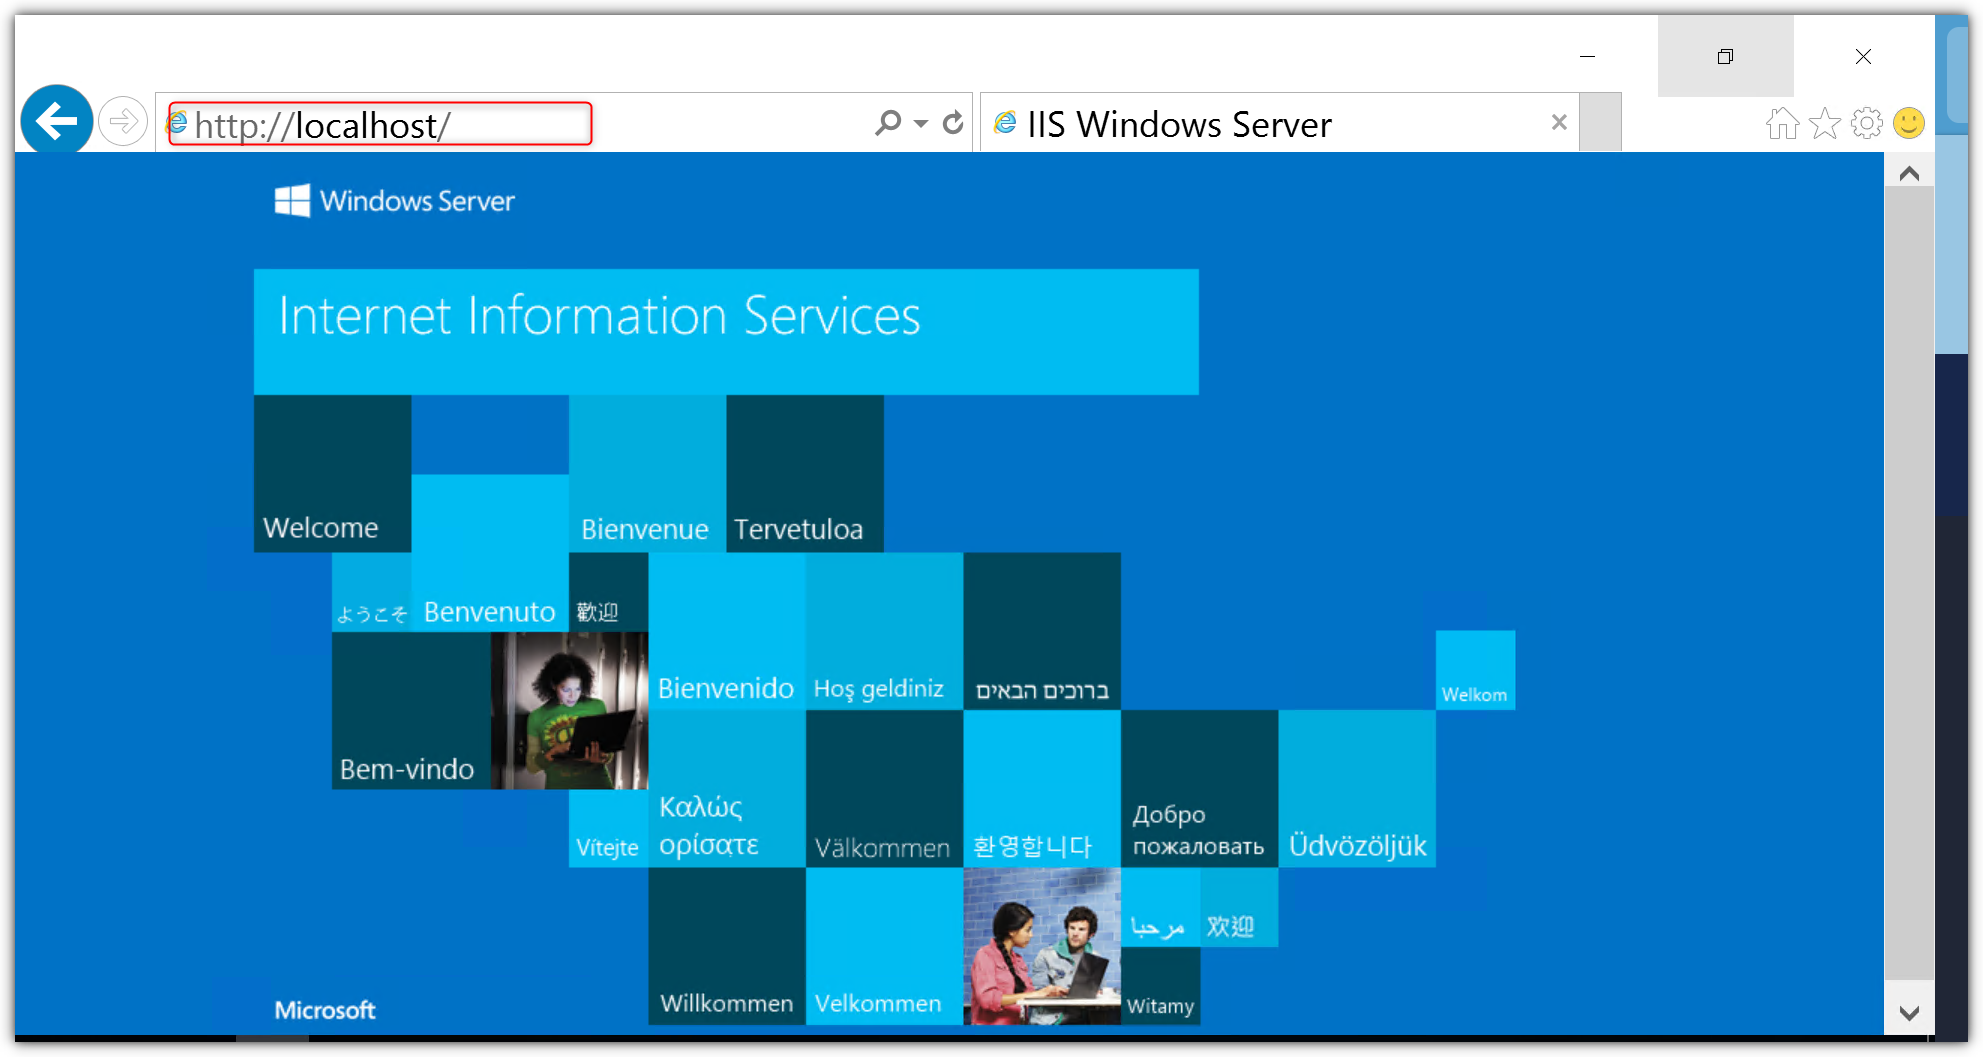
Open a web browser on VM Server

Enter the following address:
http://localhost

Press Enter.
If IIS is installed correctly, the IIS Welcome page will appear. This means the IIS web server is running successfully.
Step 9: Open IIS Manager

  • We can use IIS Manager to manage the web server.
  • Open Server Manager.
  • Click Tools.
  • Select Internet Information Services (IIS) Manager.
  • IIS Manager will open.
  • From IIS Manager, you can create and manage websites and web applications.
Conclusion
IIS Web Server is now installed on VM The server can now be used to host websites and web applications. We can use IIS Manager to configure and manage the websites.
The next useful step is to create a simple test website in IIS and check that it can be opened in a web browser.


About HostForLIFE.eu

HostForLIFE.eu is European Windows Hosting Provider which focuses on Windows Platform only. We deliver on-demand hosting solutions including Shared hosting, Reseller Hosting, Cloud Hosting, Dedicated Servers, and IT as a Service for companies of all sizes.

We have offered the latest Windows 2016 Hosting, ASP.NET Core 2.2.1 Hosting, ASP.NET MVC 6 Hosting and SQL 2017 Hosting.


Tag cloud

Sign in